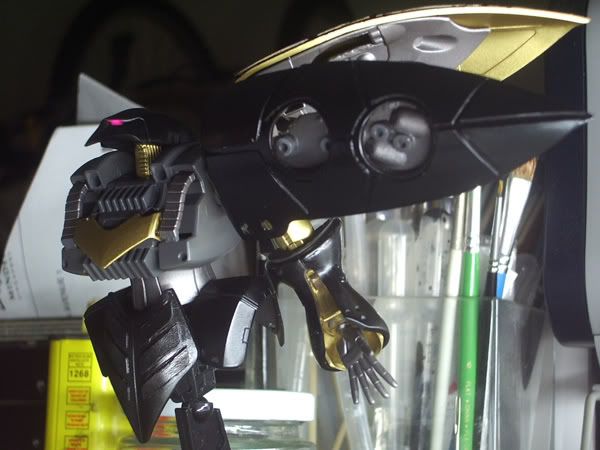
[BAKUC-06] Qubeley Core Assault
I've decided to take down one of my old poorly built kits from my dusty shelves and give it the opportunity to join the upcoming BAKUC.
It's gonna be the HGUC 1/144 Qubeley Mk II.
Im gonna beef up the Qubeley with styrene sheets.
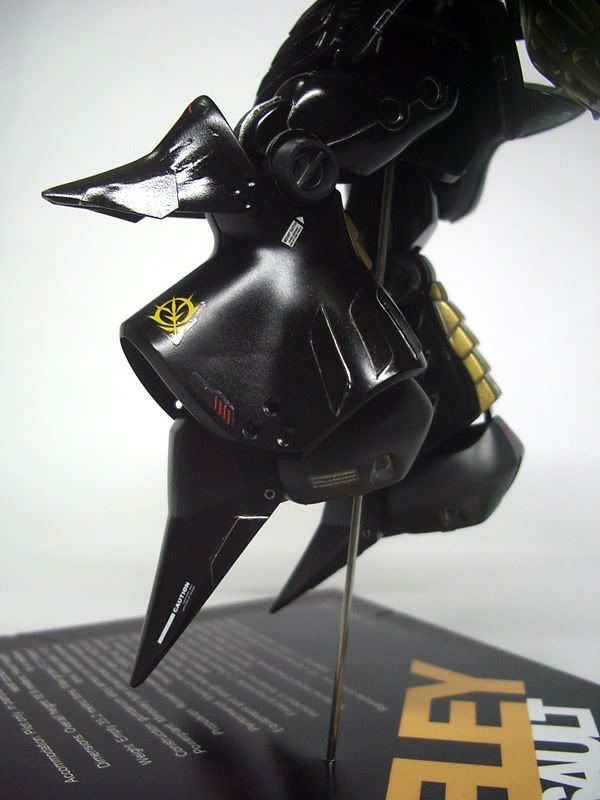
The curved surfaces of the shoulder wings proved to be quite a challenge for a first-timer.
BTW, this is my first time doing extensive modding on a kit.
Since this project is called the Qubeley Core Assault, I'll also attempt to either buy a nice cool big ass weapon from Ore-Gun or scratch build one myself.
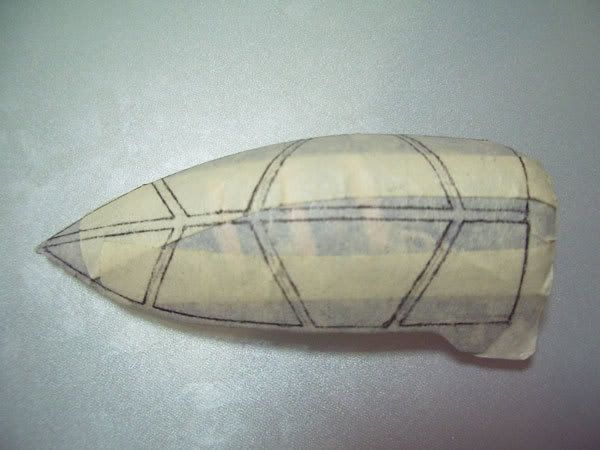
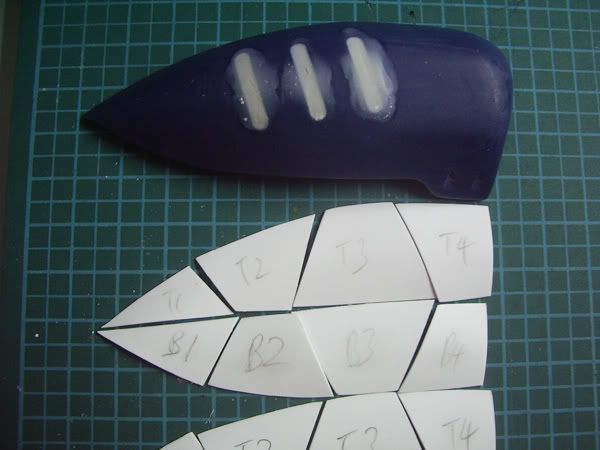
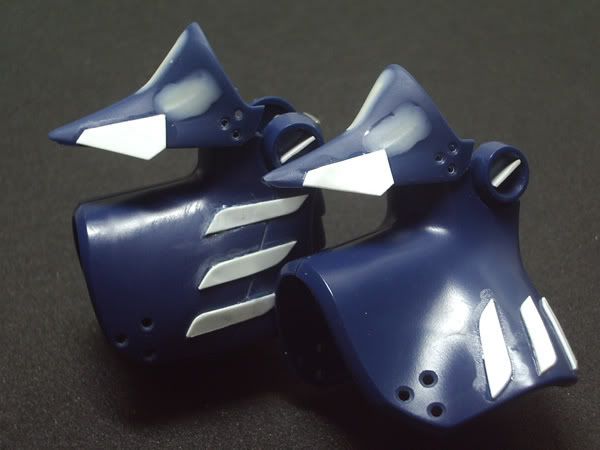
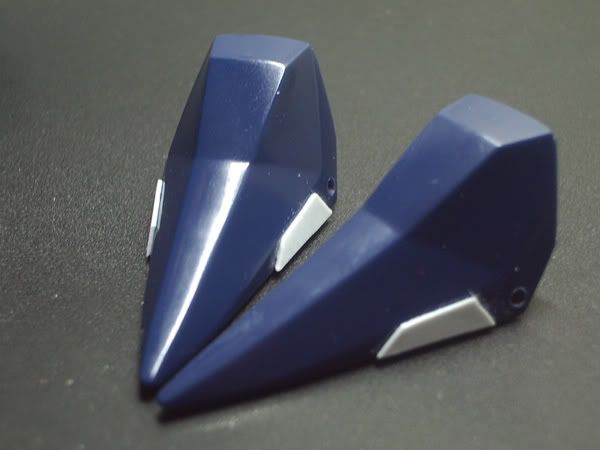
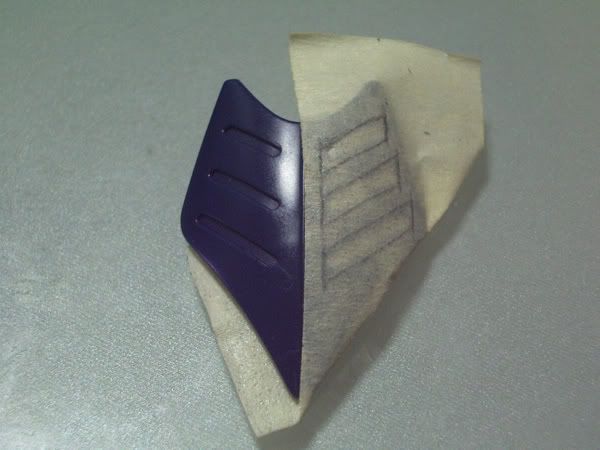
Shoulder Mods
Masked it up with normal masking tape.
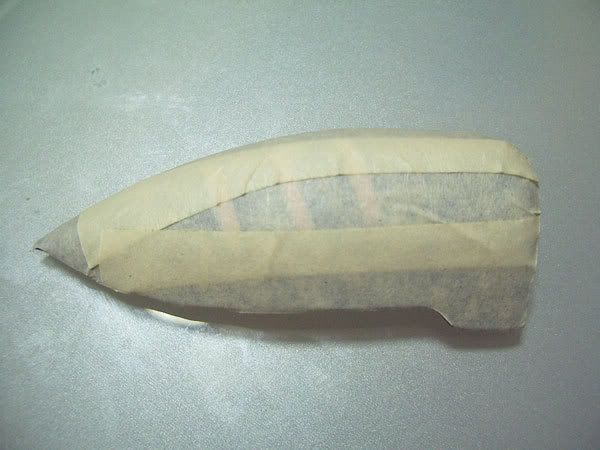
Draw my desired patterns on it.
Peel the tape off, cut em out, stick em on the styrene and cut out the shapes.
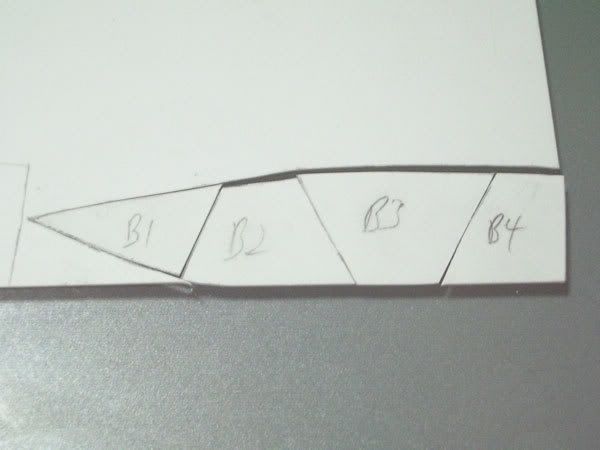
T for Top. B for Bottom. In case I get confused.
And of cos, putty up the shallow dents on the shoulder surface.
Segment T3 is pretty tricky to cement it on the surface.
Shallow gaps between the styrenes are quite a bitch to sand.
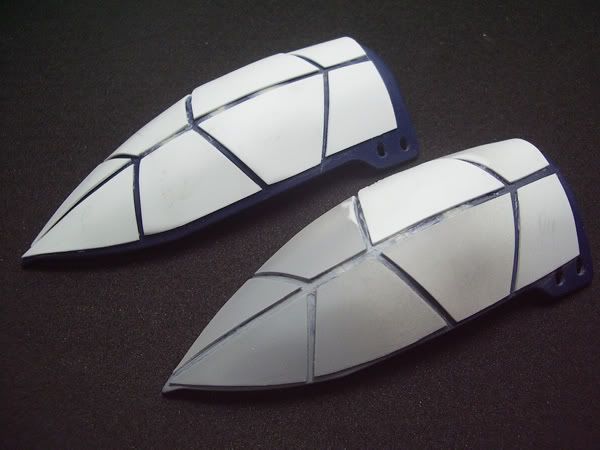
The same thing was done for the right shoulders.
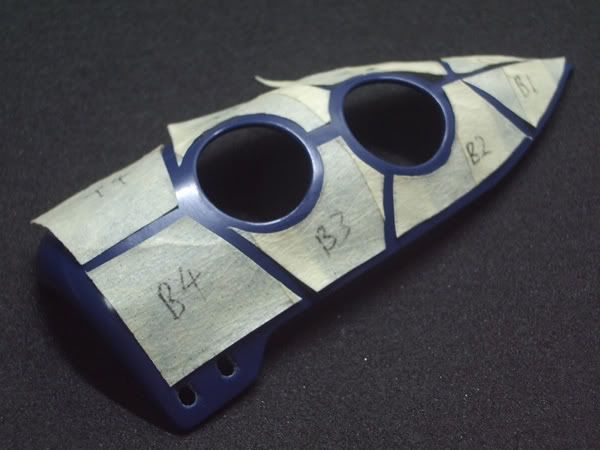
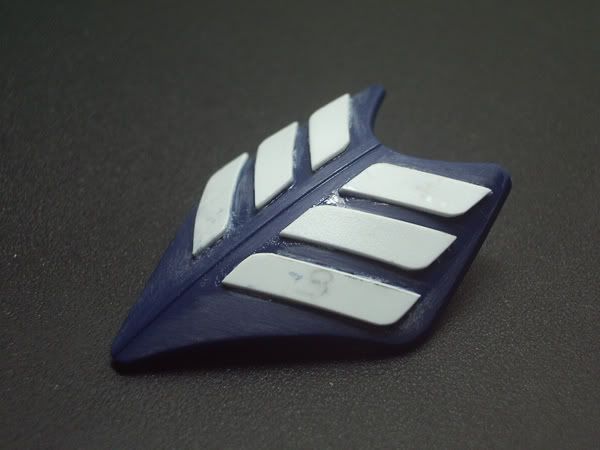
All done.

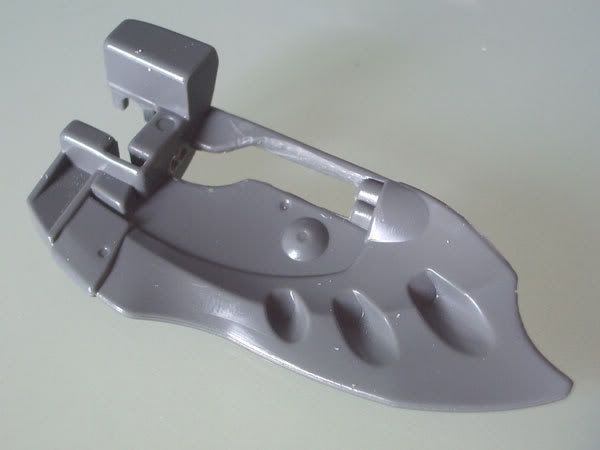
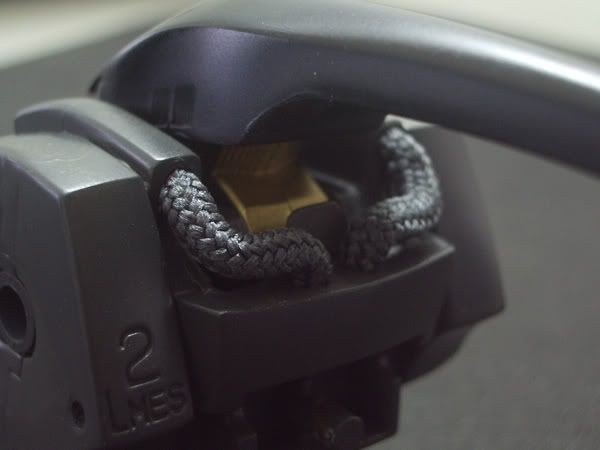
The is the inner part of a shoulder.
A large segment was gorged out so that two braided ropes can be put in its place.
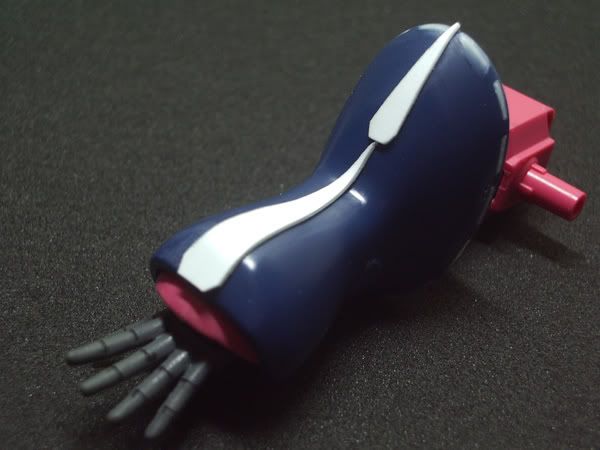
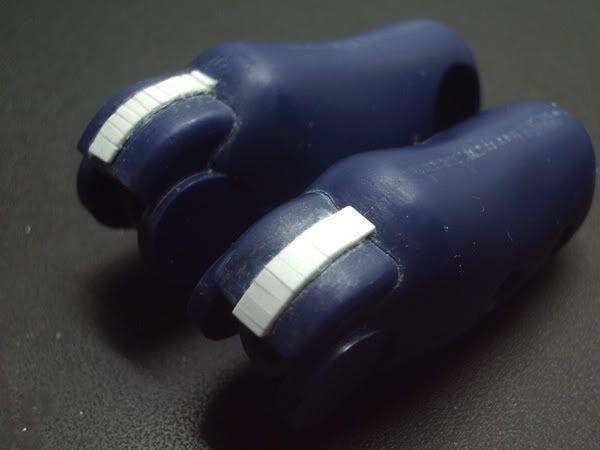
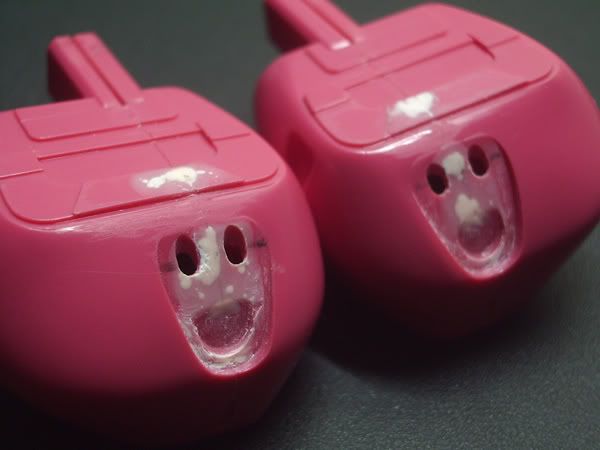
Arm Mods
Beneath these two strips of styrene is a continuous seam line.
I used these two pieces of styrene to hide the seam line so that I can paint the pink inner arm first before I attach the blue chasis of the arm.
This reliefs me from tricky masking duties too.
Leg Mods
Some detailing on the knee area.

Adding styrene here & there and drilling holes here & there.
Also done on the inner knee areas.
The toes.
The heels. Don't they look happy.
Skirt Mods
Addition of styrene.
Front skirt.
Rear skirt.

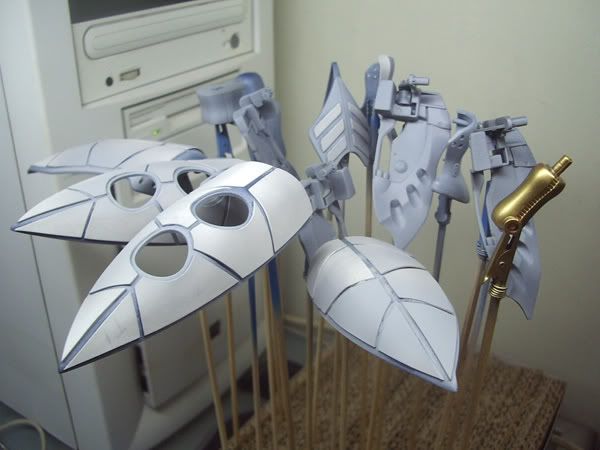
Painting
Initial priming.
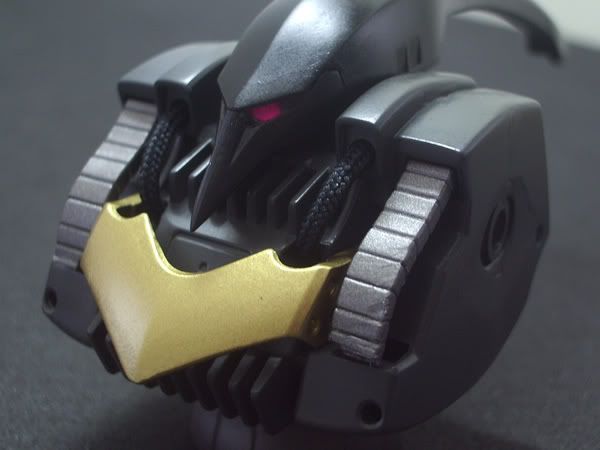
Testing out RJ 18K Gold.
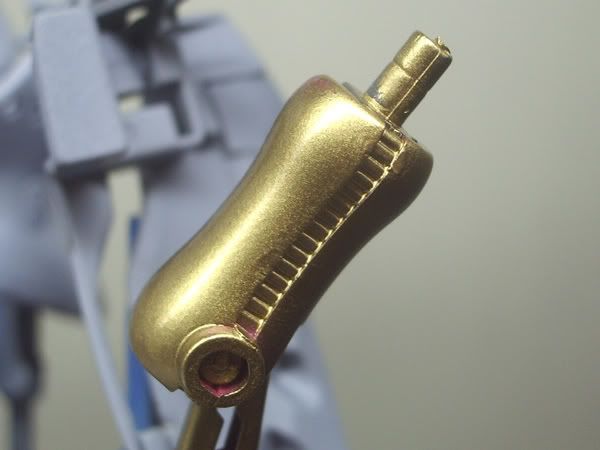
Airbrushed over at sty's workshop.
Damn, I'm hooked on airbrushing......
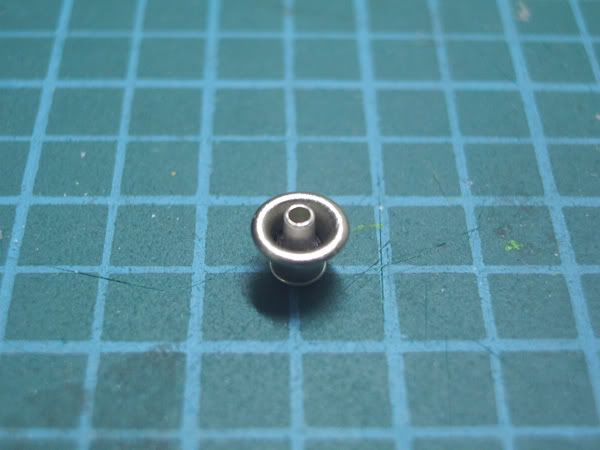
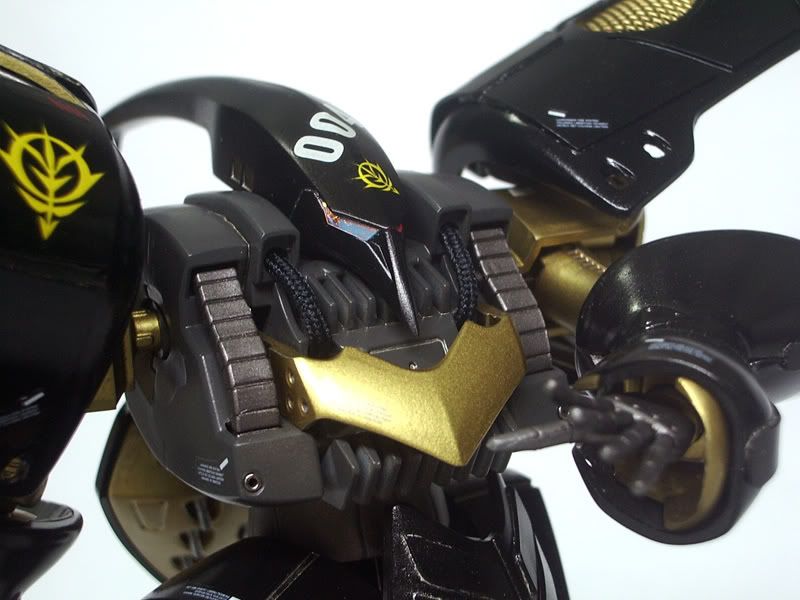
Mini Thrusters
I wanted to add some details to the shoulders by adding in some mini thrusters.
Using rivets of different sizes and a bit of PCB tape.
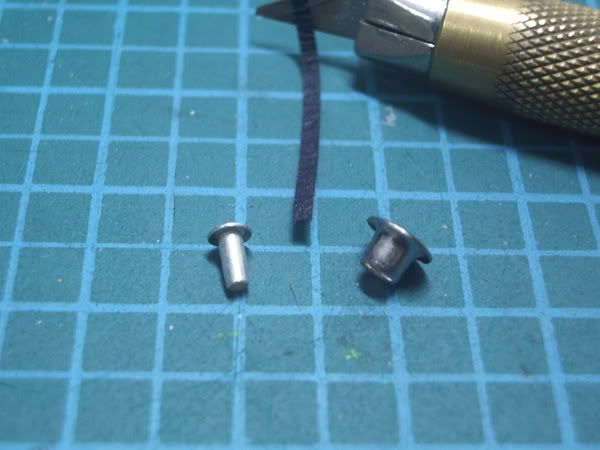
Wind the PCB tape around the smaller rivet so that when the bigger one fits over it, it would be tight.
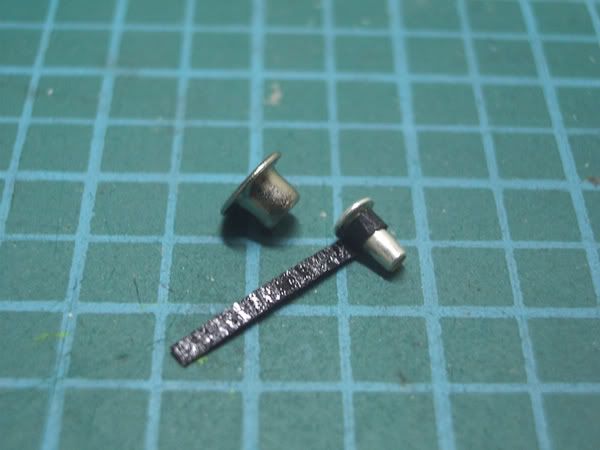
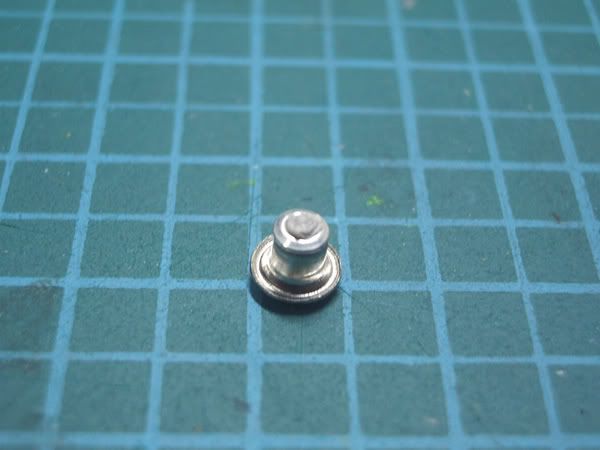
Slowly stuff the bigger rivet over the smaller one.
Using the hobby knife to guide it in as well.
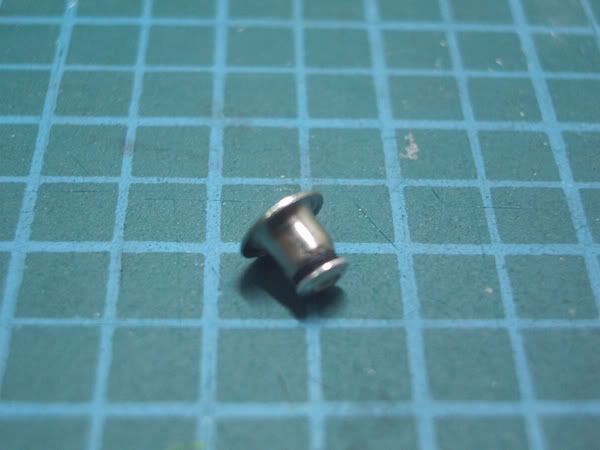
Done.
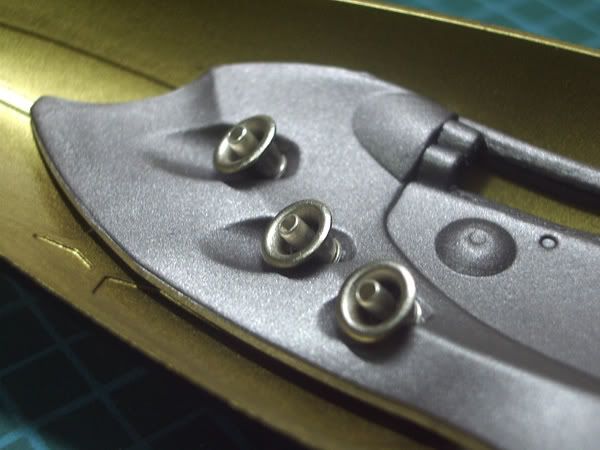
Attached some blu-tac to the butt.
And stick it onto the surface.
Finished.
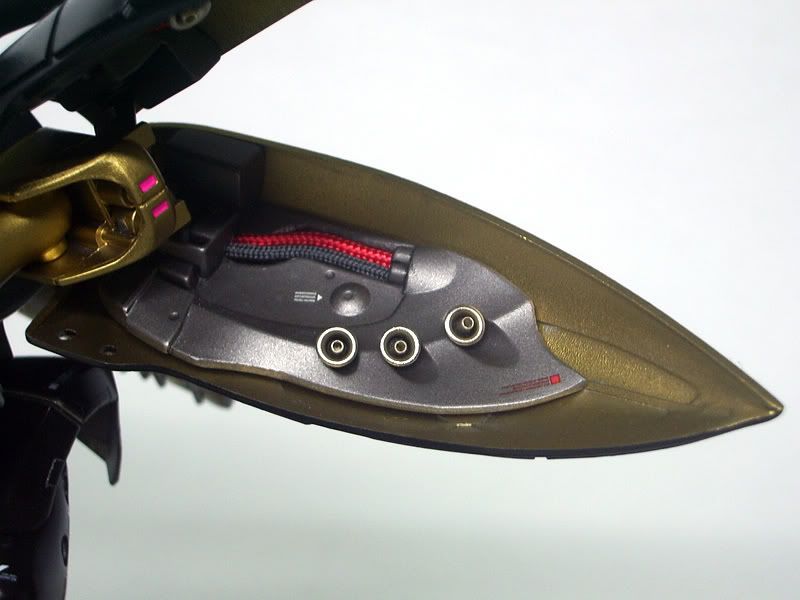
Braided rope
Cut to size/length & stuff em in.
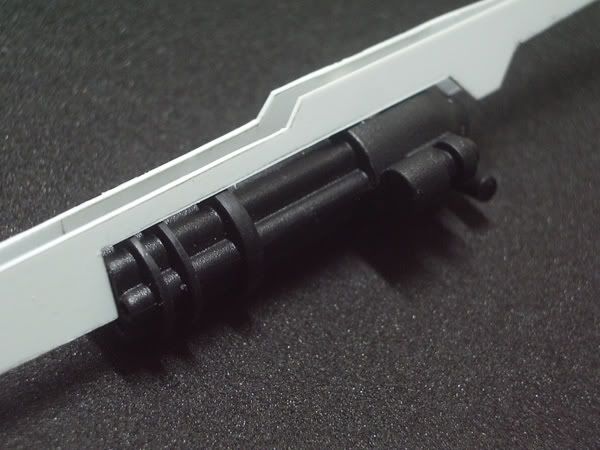
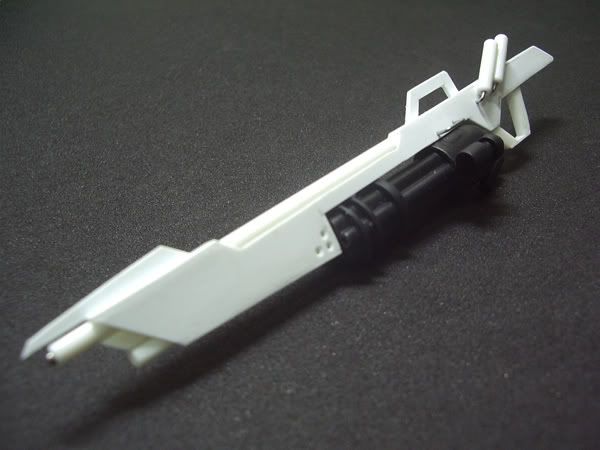
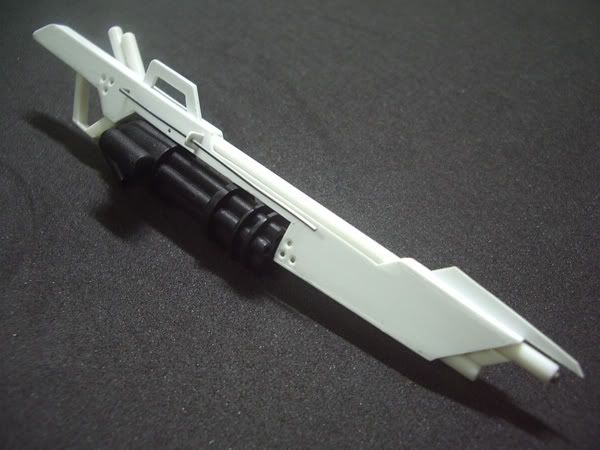
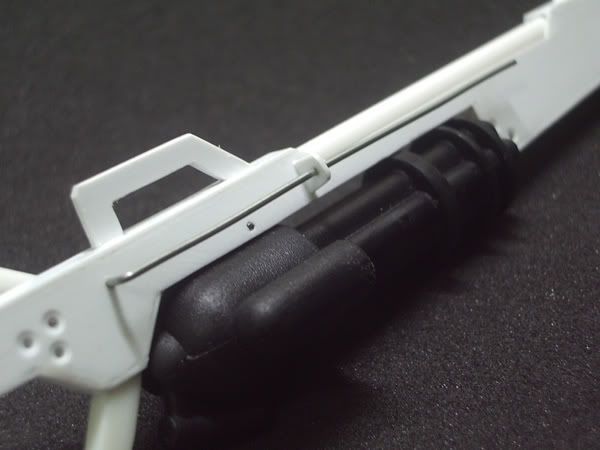
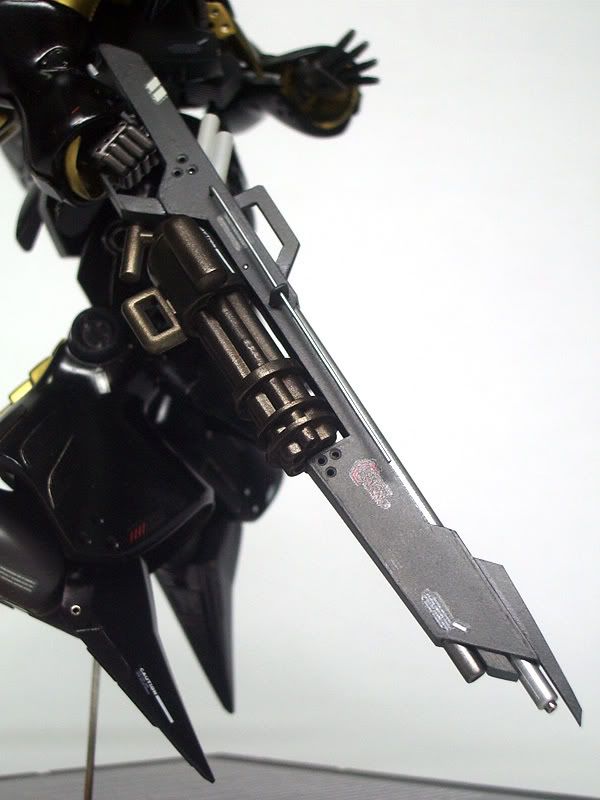
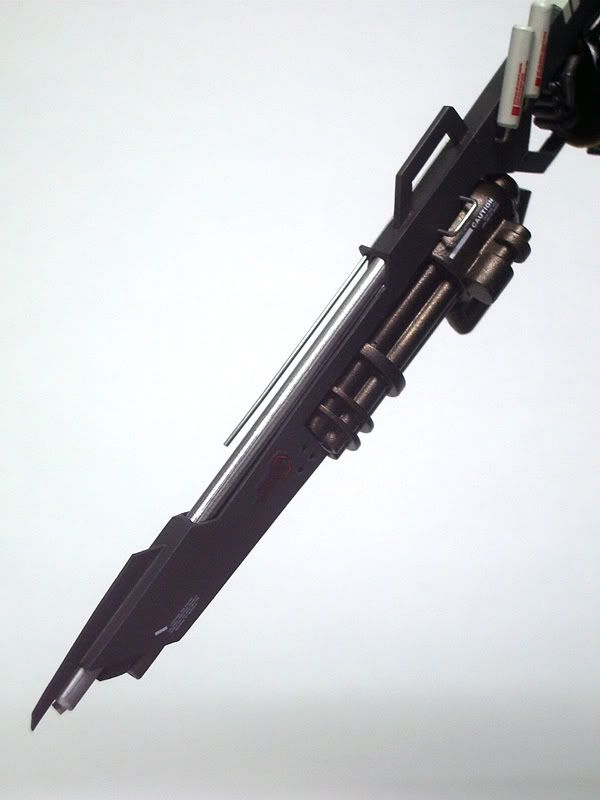
Scratch Built Rifle
The main design is to have a beam rifle combined with a gatling gun.
The gatling gun was found from one of my Stikfas figurines.
The shape of the rifle was first drawn on a piece of paper, then it was cut out and traced on 0.5mm thick styrene.

Further pieces of sytrene were added to buld up the rifle.
Parts of the tree were also used to build the barrel of the rifle.
Parts of the Stikfas tree were used to build the handle of the rifle.
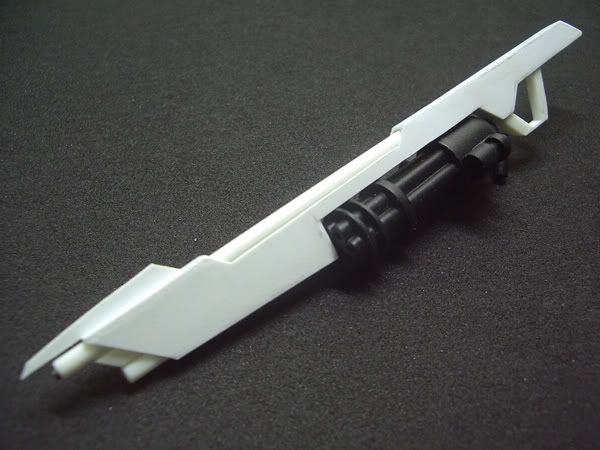
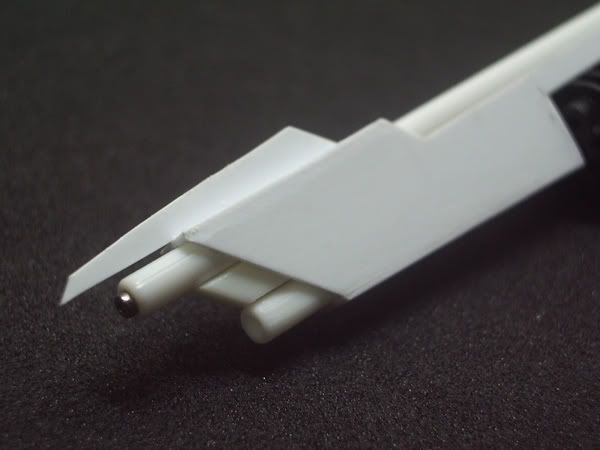
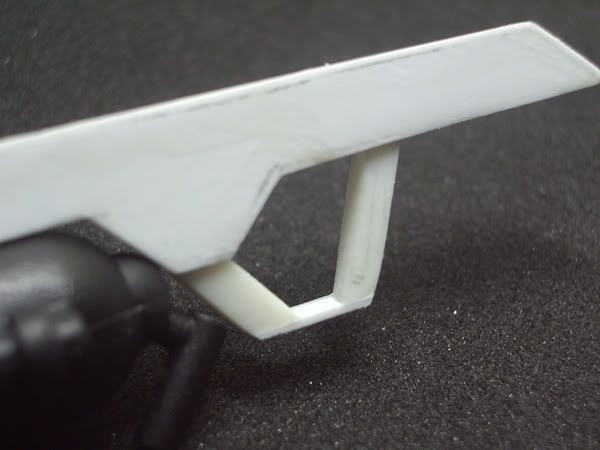
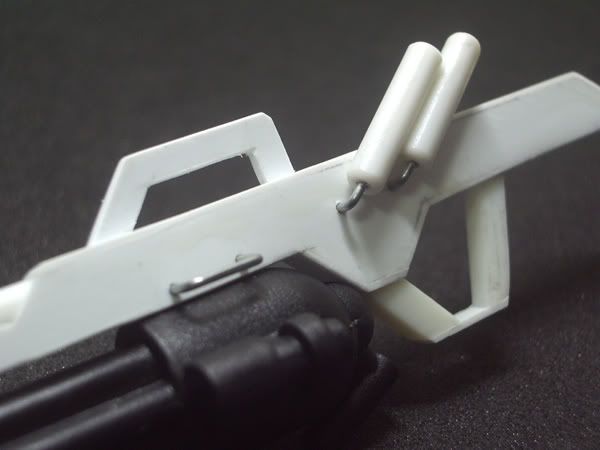
I still felt that the rifle is pretty dull so I added more details using more styrene rods and even wires.
So this is how it looks now.
All it needs now is a decent paint job.
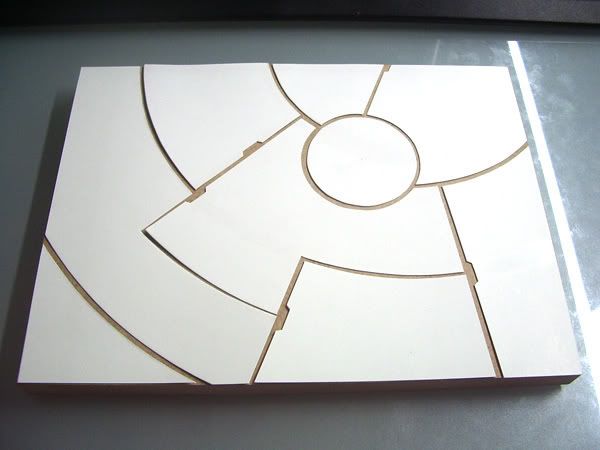
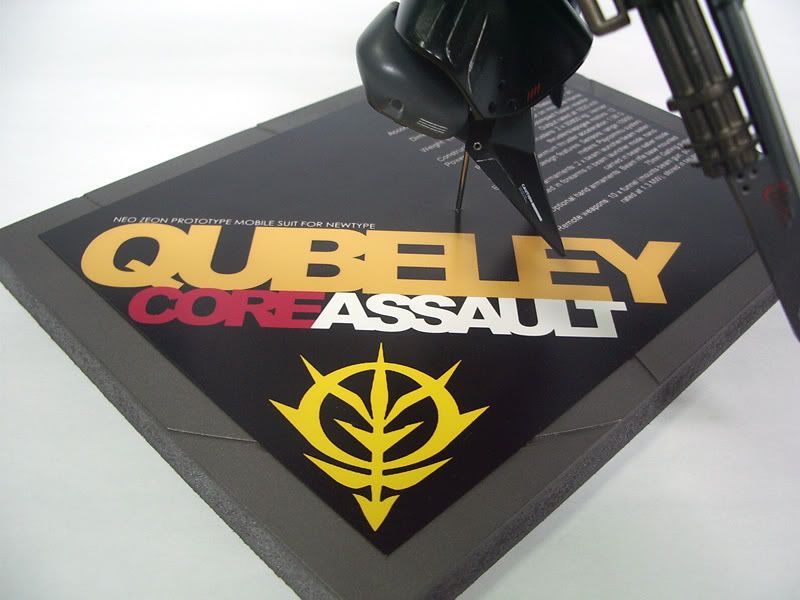
Display Base
Paper design.
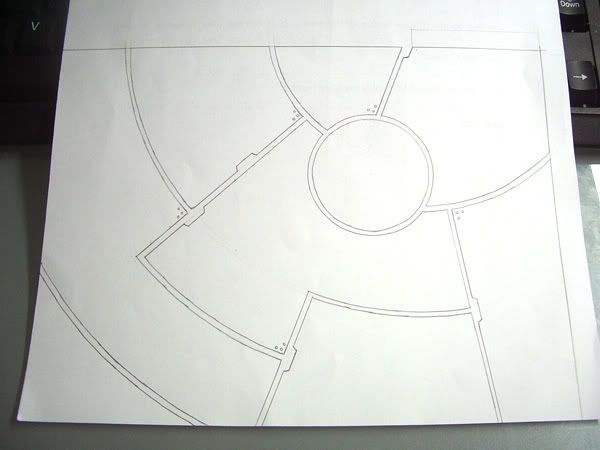
Realised it on a cardboard.
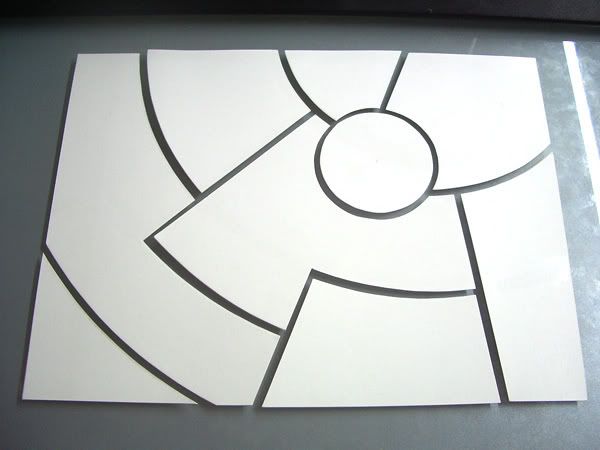
Tested the fitting on the MDF(20 x 15 cm) from Art Fiend.
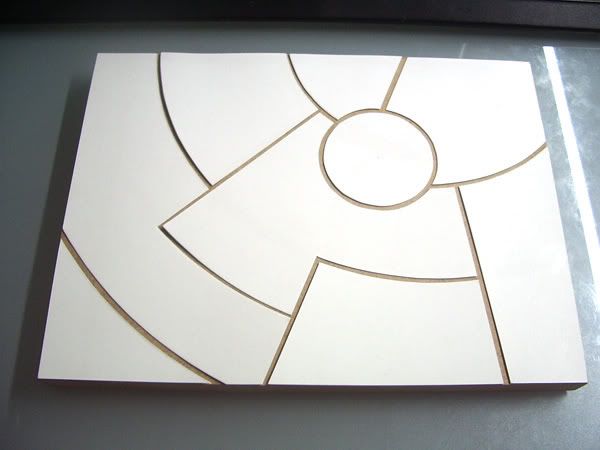
Adding in the details.
More details.
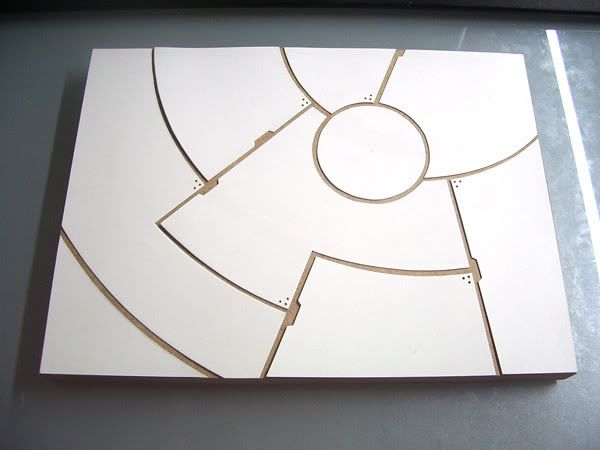

Test posing with a dummy Qubeley.
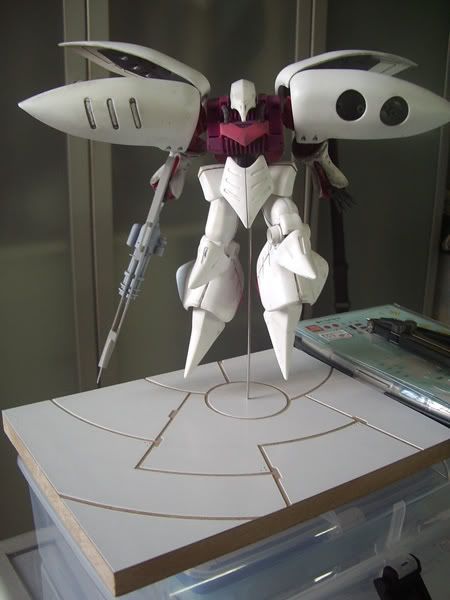
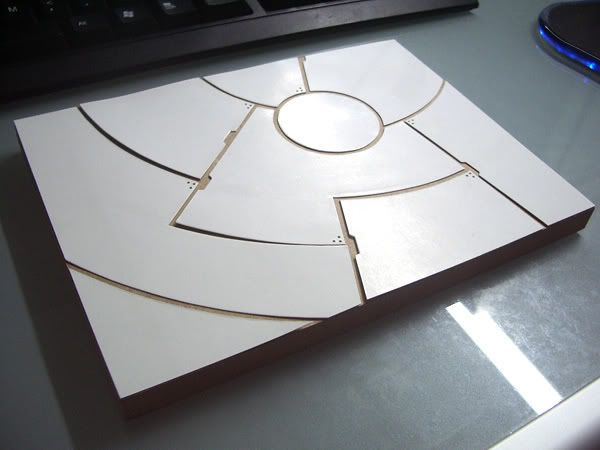
95% done - lack panel lining and coloring of the weapon & base.
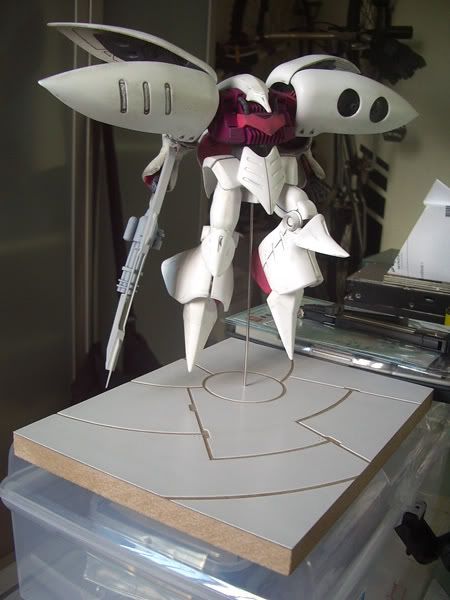
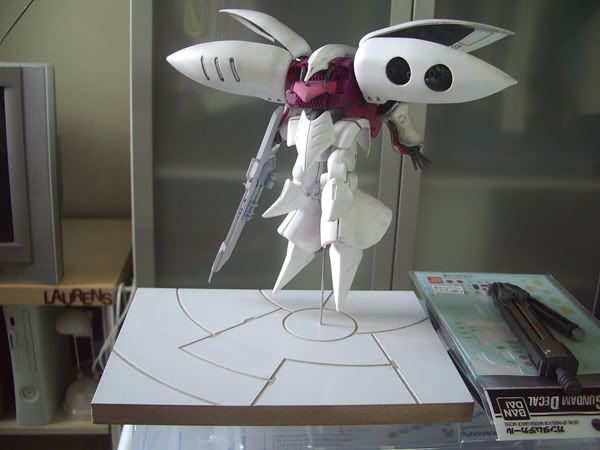
Pose #1.
Done.
Somehow I'm abit unsatisfied with the base.
Well, the base is too plain.
So I designed something in the dimensions of a 5R photo and sent it for digital prints.
It costs $1.50.
I understand that the ratio of typical digital pictures sizes (eg. 1024 x 768) from our digicams are different from standard photo sizes (4R, 5R & etc).
So I design the base according to the ratio of standard photo sizes.
Some problems faced are that even though I designed the base in the size of 5R (5 x 7") in photoshop, when I submitted it for printing, the lady still has to crop it.
I noticed that some text & details would be missing so I went home to alter my design (gave it a bigger border) and went back again.
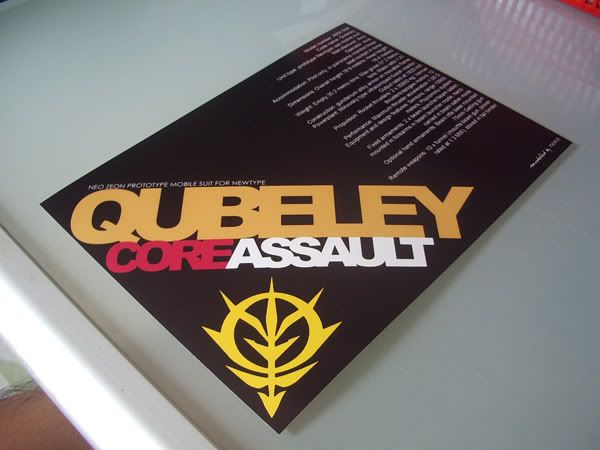
Even so, the print out was not perfect.
But the resolution is acceptable.
Now that I know what to look out for when sending my digital pix for prints, I'd know what to do when editing the pix which will be sent for the competition.
I'm not expecting to win anything.
I'm only hoping to be selected for display. Heh Heh.
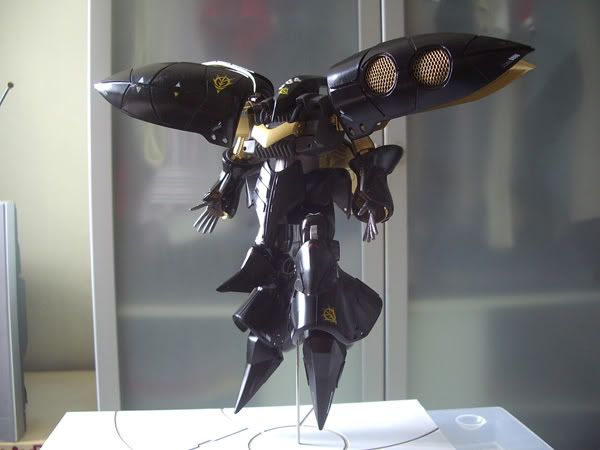
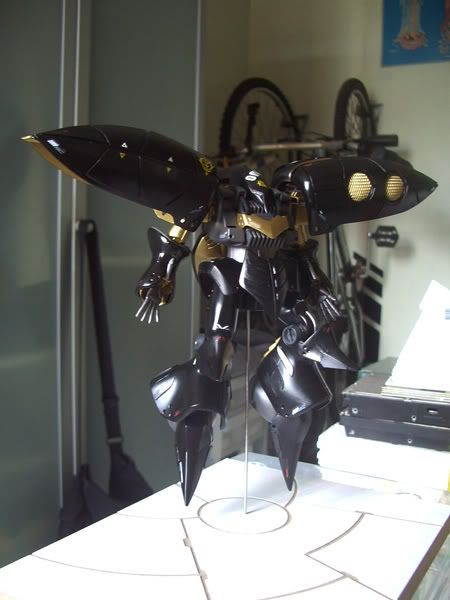
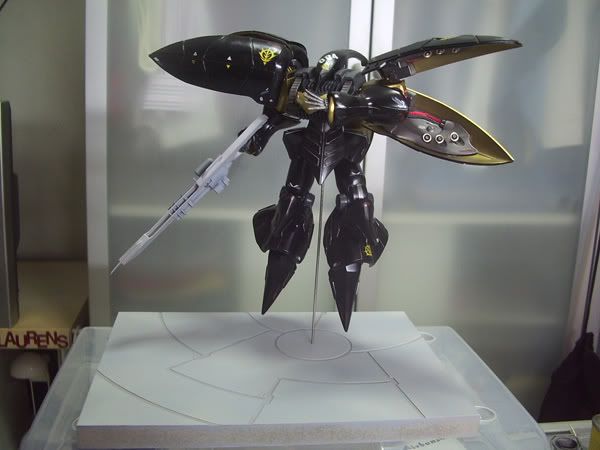
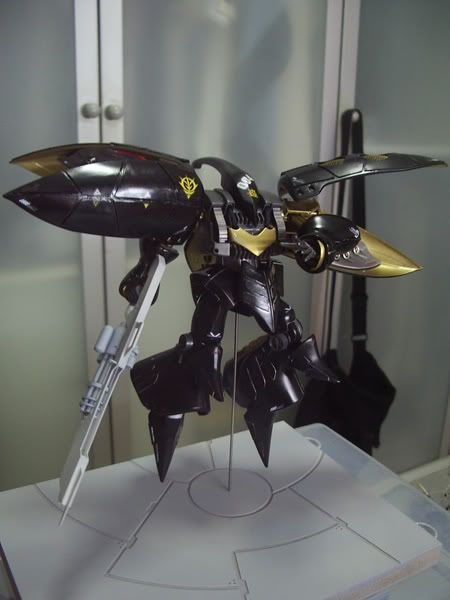
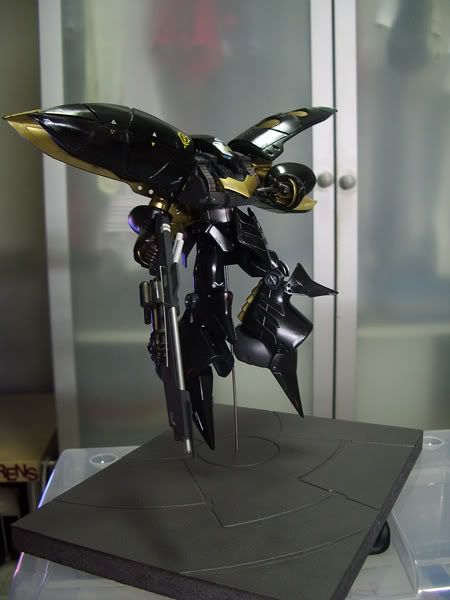
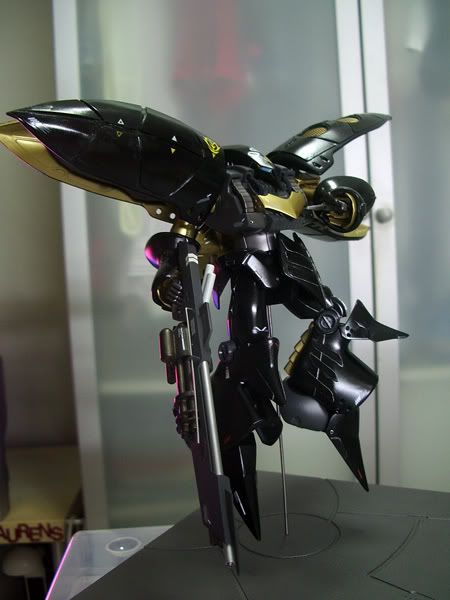
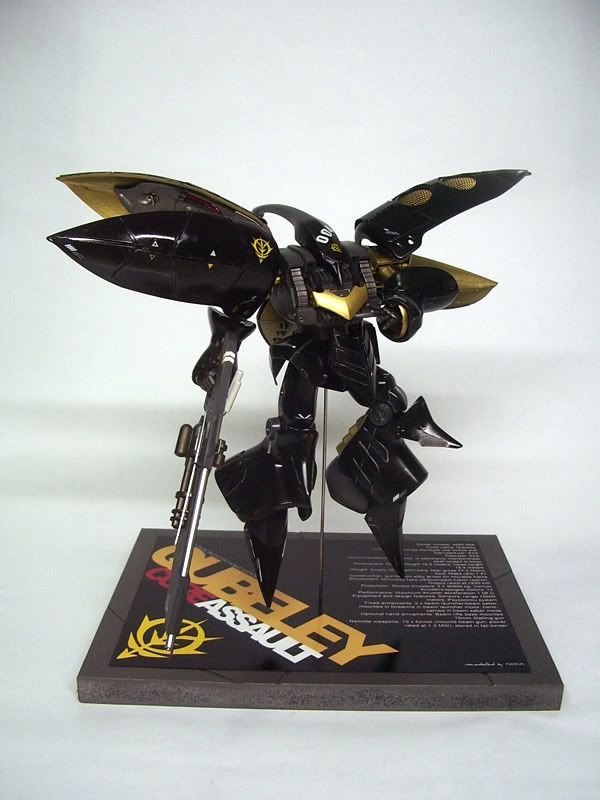
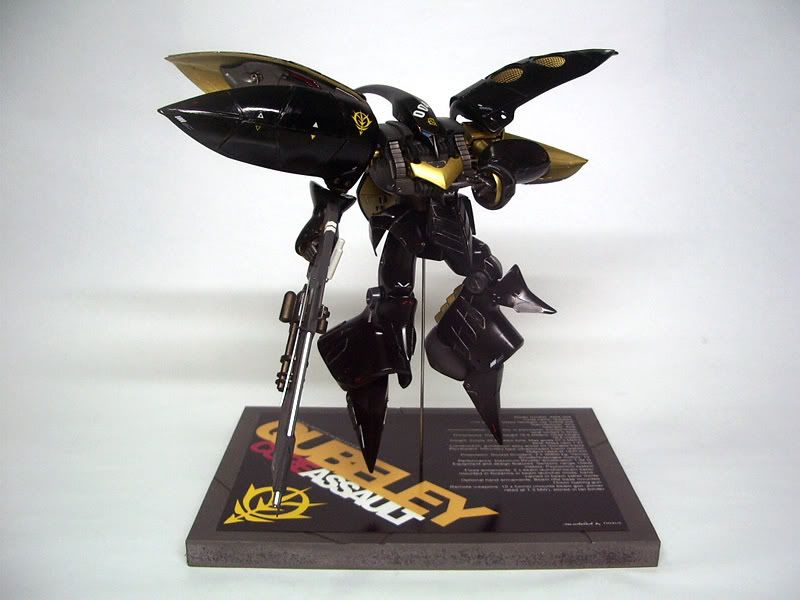
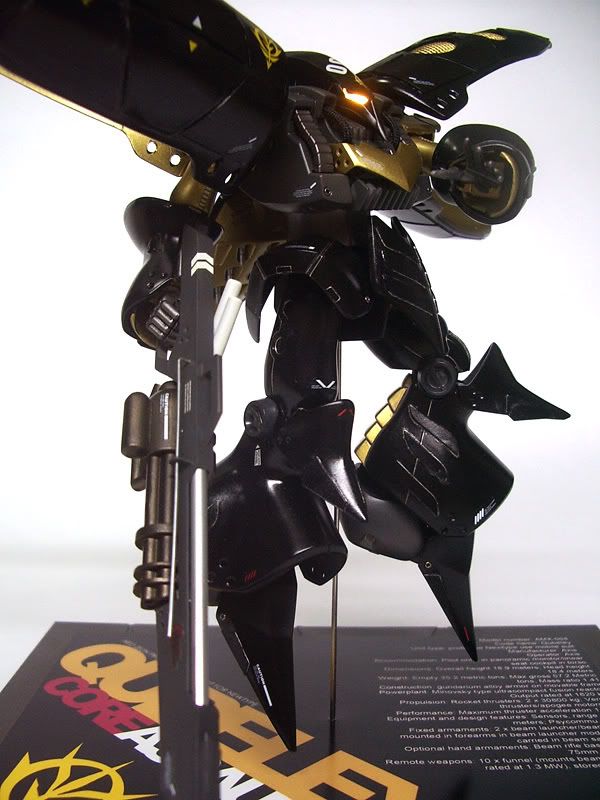
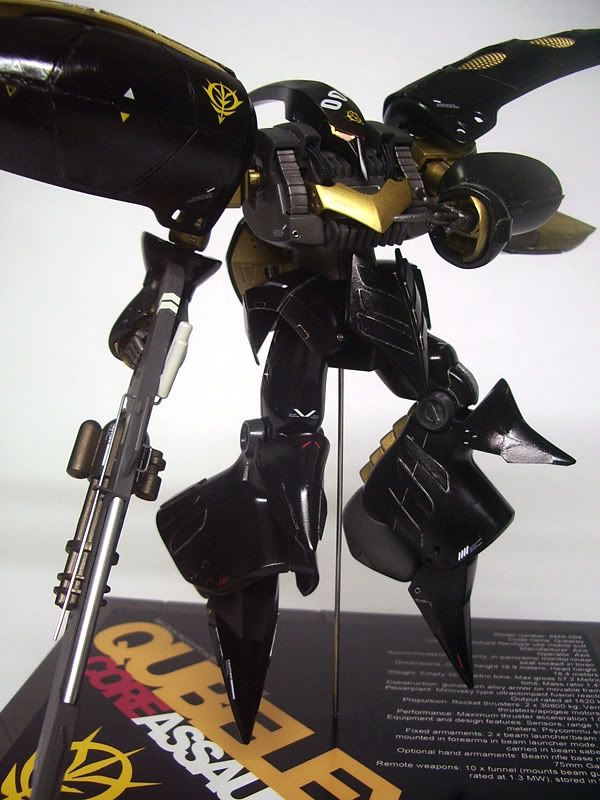
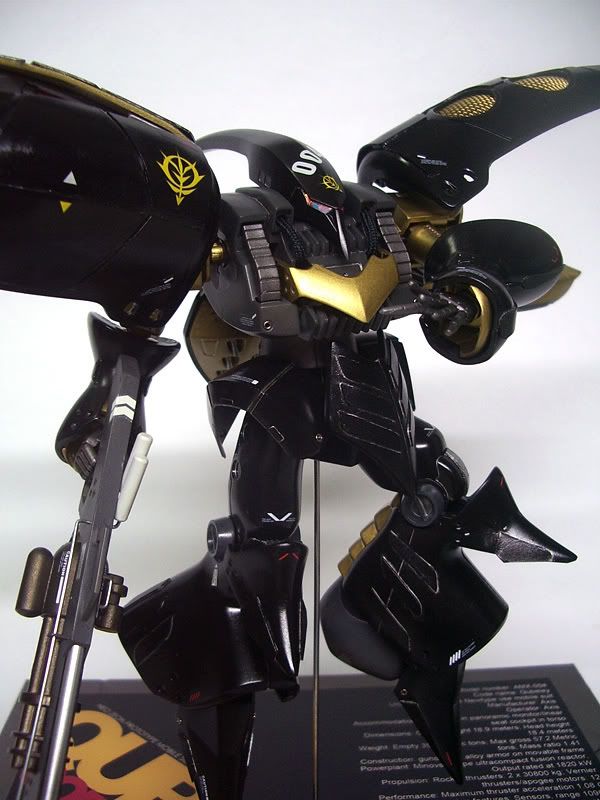
Below are some pix of the completed model kit.
COMPLETED

Rest of the gallery can be found HERE.
It's gonna be the HGUC 1/144 Qubeley Mk II.
Im gonna beef up the Qubeley with styrene sheets.
The curved surfaces of the shoulder wings proved to be quite a challenge for a first-timer.
BTW, this is my first time doing extensive modding on a kit.
Since this project is called the Qubeley Core Assault, I'll also attempt to either buy a nice cool big ass weapon from Ore-Gun or scratch build one myself.
Shoulder Mods
Masked it up with normal masking tape.
Draw my desired patterns on it.
Peel the tape off, cut em out, stick em on the styrene and cut out the shapes.
T for Top. B for Bottom. In case I get confused.
And of cos, putty up the shallow dents on the shoulder surface.
Segment T3 is pretty tricky to cement it on the surface.
Shallow gaps between the styrenes are quite a bitch to sand.
The same thing was done for the right shoulders.
All done.
The is the inner part of a shoulder.
A large segment was gorged out so that two braided ropes can be put in its place.
Arm Mods
Beneath these two strips of styrene is a continuous seam line.
I used these two pieces of styrene to hide the seam line so that I can paint the pink inner arm first before I attach the blue chasis of the arm.
This reliefs me from tricky masking duties too.
Leg Mods
Some detailing on the knee area.
Adding styrene here & there and drilling holes here & there.
Also done on the inner knee areas.
The toes.
The heels. Don't they look happy.
Skirt Mods
Addition of styrene.
Front skirt.
Rear skirt.
Painting
Initial priming.
Testing out RJ 18K Gold.
Airbrushed over at sty's workshop.
Damn, I'm hooked on airbrushing......
Mini Thrusters
I wanted to add some details to the shoulders by adding in some mini thrusters.
Using rivets of different sizes and a bit of PCB tape.
Wind the PCB tape around the smaller rivet so that when the bigger one fits over it, it would be tight.
Slowly stuff the bigger rivet over the smaller one.
Using the hobby knife to guide it in as well.
Done.
Attached some blu-tac to the butt.
And stick it onto the surface.
Finished.
Braided rope
Cut to size/length & stuff em in.
Scratch Built Rifle
The main design is to have a beam rifle combined with a gatling gun.
The gatling gun was found from one of my Stikfas figurines.
The shape of the rifle was first drawn on a piece of paper, then it was cut out and traced on 0.5mm thick styrene.
Further pieces of sytrene were added to buld up the rifle.
Parts of the tree were also used to build the barrel of the rifle.
Parts of the Stikfas tree were used to build the handle of the rifle.
I still felt that the rifle is pretty dull so I added more details using more styrene rods and even wires.
So this is how it looks now.
All it needs now is a decent paint job.
Display Base
Paper design.
Realised it on a cardboard.
Tested the fitting on the MDF(20 x 15 cm) from Art Fiend.
Adding in the details.
More details.
Test posing with a dummy Qubeley.
95% done - lack panel lining and coloring of the weapon & base.
Pose #1.
Done.
Somehow I'm abit unsatisfied with the base.
Well, the base is too plain.
So I designed something in the dimensions of a 5R photo and sent it for digital prints.
It costs $1.50.
I understand that the ratio of typical digital pictures sizes (eg. 1024 x 768) from our digicams are different from standard photo sizes (4R, 5R & etc).
So I design the base according to the ratio of standard photo sizes.
Some problems faced are that even though I designed the base in the size of 5R (5 x 7") in photoshop, when I submitted it for printing, the lady still has to crop it.
I noticed that some text & details would be missing so I went home to alter my design (gave it a bigger border) and went back again.
Even so, the print out was not perfect.
But the resolution is acceptable.
Now that I know what to look out for when sending my digital pix for prints, I'd know what to do when editing the pix which will be sent for the competition.
I'm not expecting to win anything.
I'm only hoping to be selected for display. Heh Heh.
Below are some pix of the completed model kit.
COMPLETED
Rest of the gallery can be found HERE.


Comments
i like the mods for the wing,
very unique idea.
i hope to see more of the production.
anyway you call that the skirt, not the groin.