nexustand version 3.0
Recently, I've been working with a bit of acrylic sticks and sheets.
Then I began to miss how I used to innovate my nexustand.
So, let's get right to it.
I want it to have:
- a poseable spine but not by using the bendy wire.
- a more secure base-to-spine connection.
- a thicker base(preferably 3mm & abv).
- a less bulky looking torso grip.
Materials used:
- PP foam(translucent white)
- acrylic stick(5mm diameter)
- aluminium wire(3mm)
(click on images to enlarge)
Making the spinal joints:
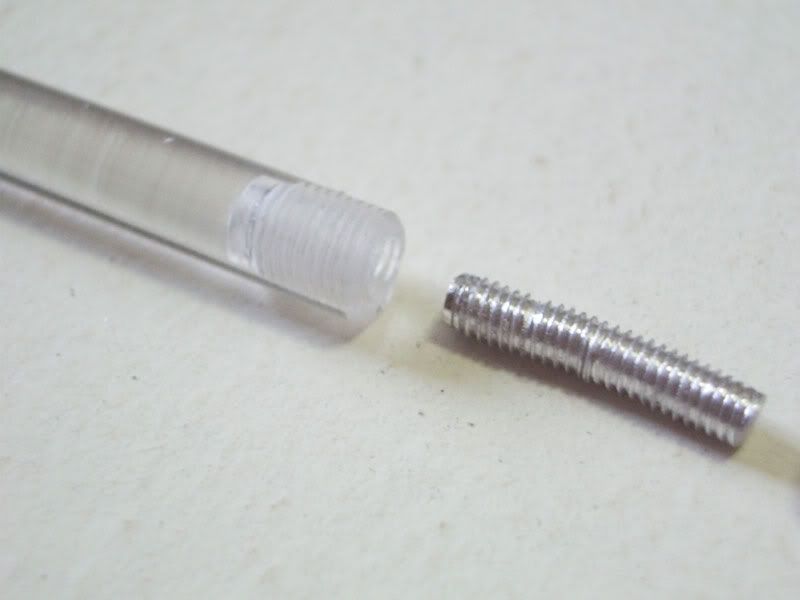
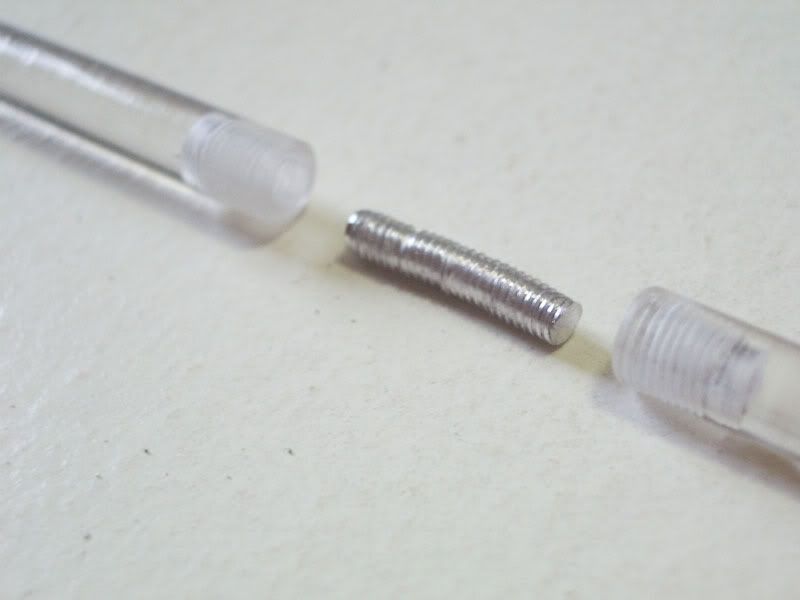
A 3mm screw tap & die was used to make these joints.
It gave me sore fingers after trying to do precision drilling on the ends of the acrylic sticks and threading the aluminium wire.
The spinal joint unit:
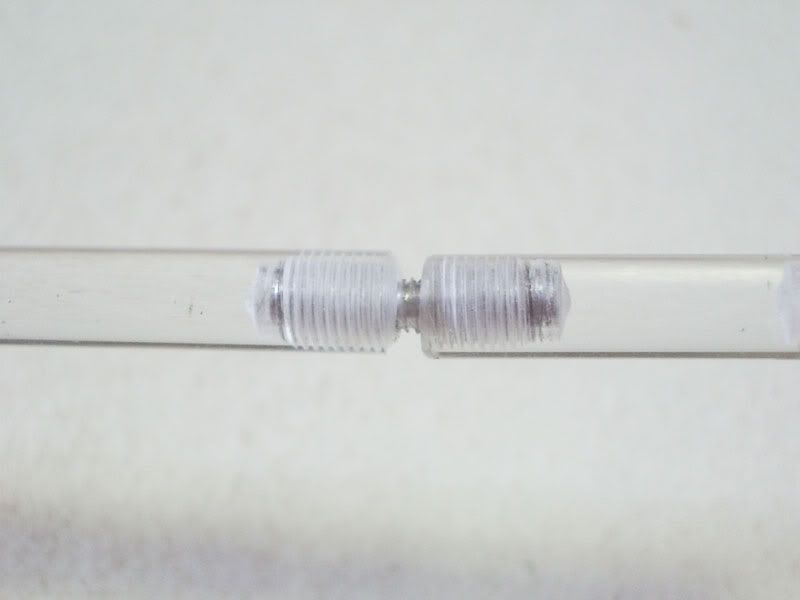

A small allowance needs to be given in between the sticks so that the aluminium wire can be bent.
The torso grip:
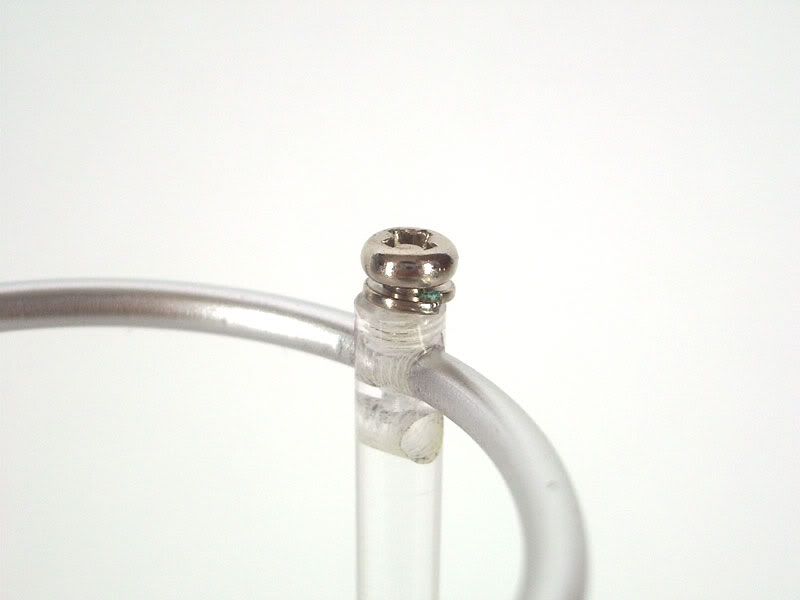
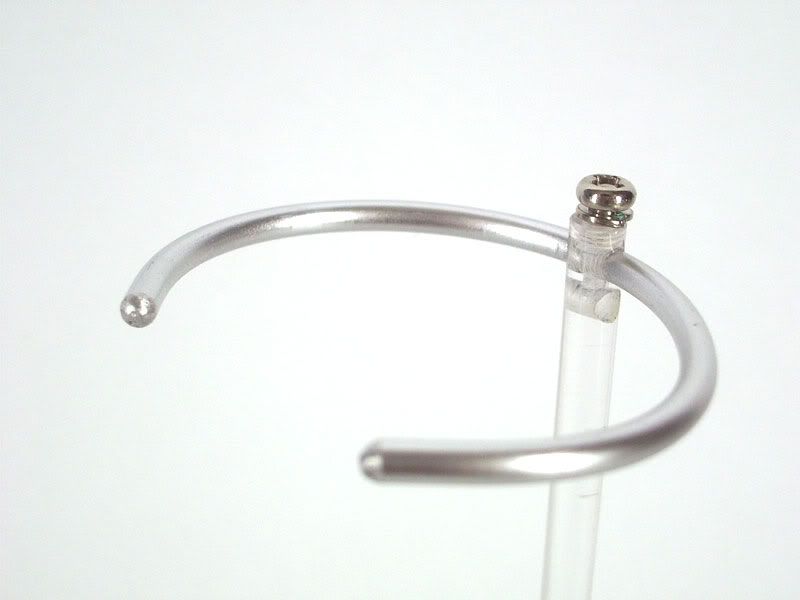
It was a simple design but extremely difficult to realise.
The horizontal hole(3mm) for the aluminium wire and the vertical hole(3mm) for the screw forms a T-junction kinda tunnel.
The spine is only of 5mm in diameter.
This weakens the architecture of the torso grip.
The structure broke once, hence the original design is now about 1cm shorter.
In future, a 6mm diameter acrylic stick would be used(it only costs 10cent more).
*note: the extra hole in the spine is part of another torso grip design which failed miserably as it was too stiff to manipulate and too difficult to insert*
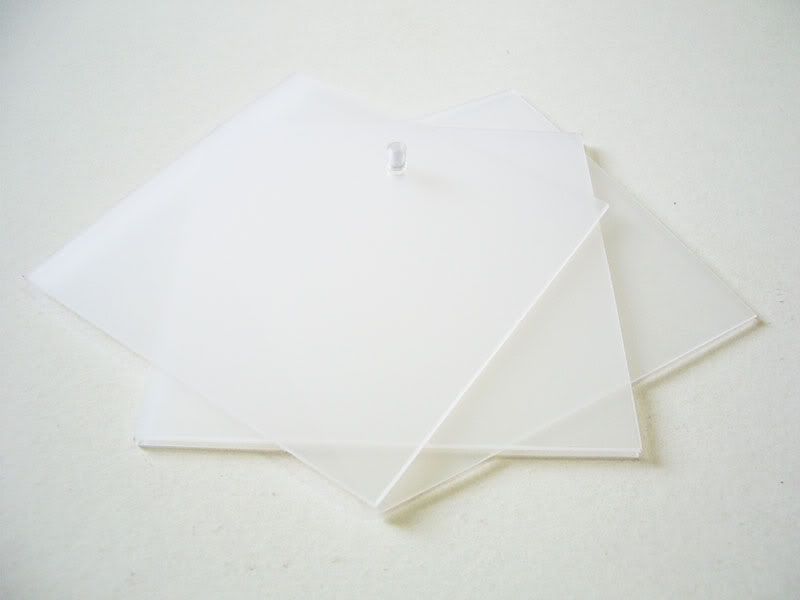
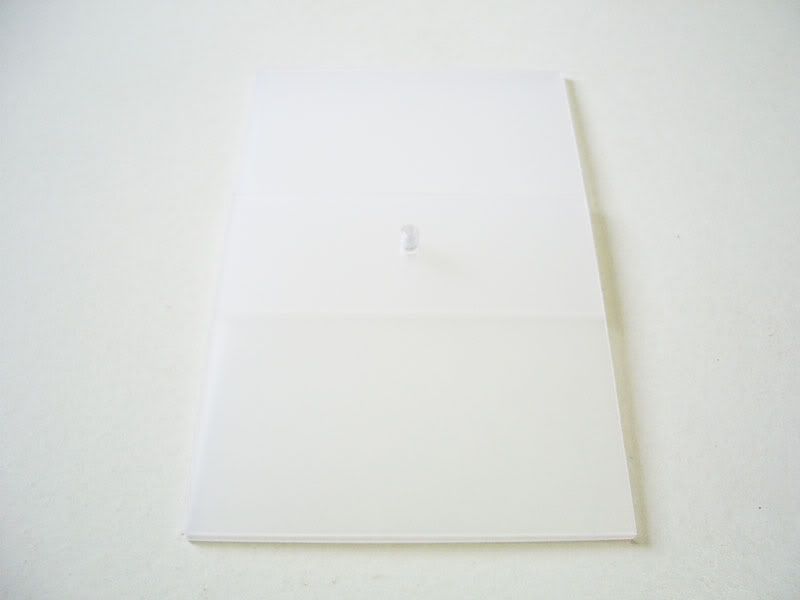
The base:

The base is a 4 ply PP foam design, each ply is 100 x 100 x 1.2 mm.
Why 4 ply?
This thickness(4.8mm) gives a good sturdy support for the base-to-spine connection.
Also a thicker base is more aesthetically pleasing.
Why only 100 x 100 mm?
This stand is intended for use with both 1/100 and 1/144 gunpla models.
Hence a base of this size would look proportional when displaying these model kits.
Of course, stability is considered too.
(Actually, the main reason why it's 100 x 100 mm is because the raw material comes in the form of a 200 x 700 mm board and cutting it into 100 x 100 mm pieces is more convienent & economical.)
Rotational designs:
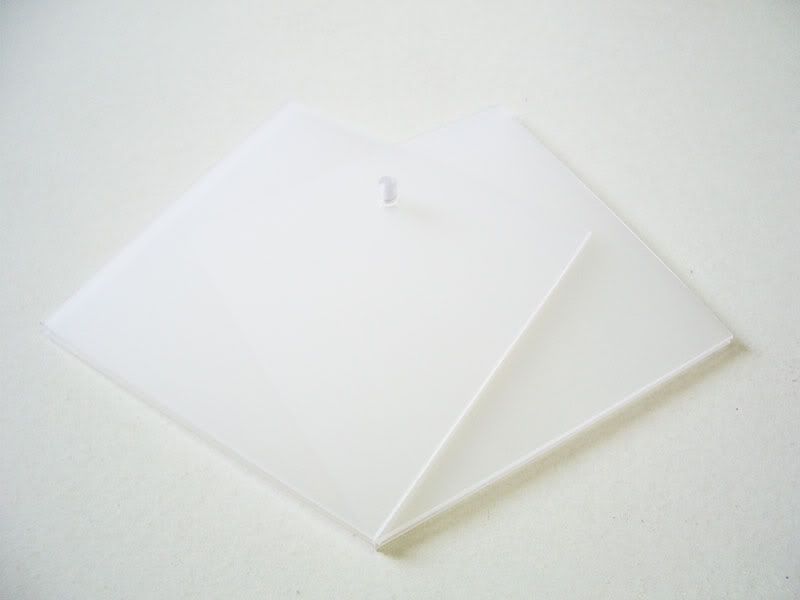
Since it's 4 ply and only joined in one spot......why not rotate the pieces around and see what shapes you can get?
Elongated base:

One of my favourites.
Great for mechas with long and big ass rifles.
The nexustand version 3.0 (NSLP-V30A):
This arrangement of the spine is suitable for 1/100 kits:
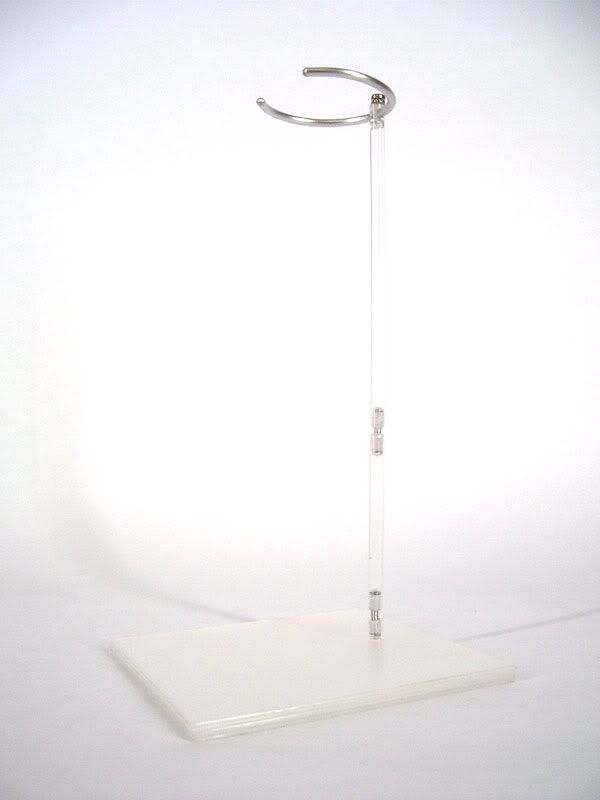
Approx height: 180 mm
This arrangement of the spine is suitable for 1/144 kits:
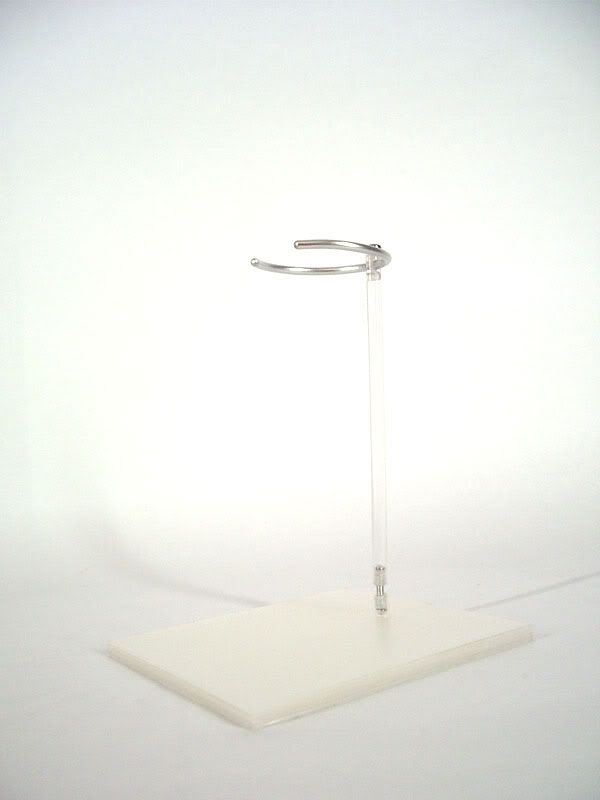
Approx height: 120 mm
Flexibility:
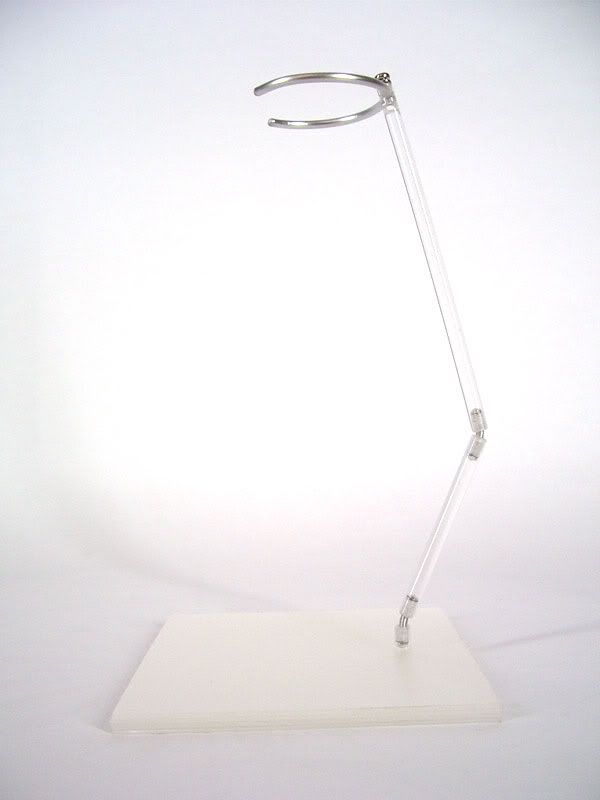
Because the spinal joints are aluminium, the spine is poseable.
The torso grip wire is also bendable.
The pitch of the torso grip can also be adjusted by loosening and tightening the screw.
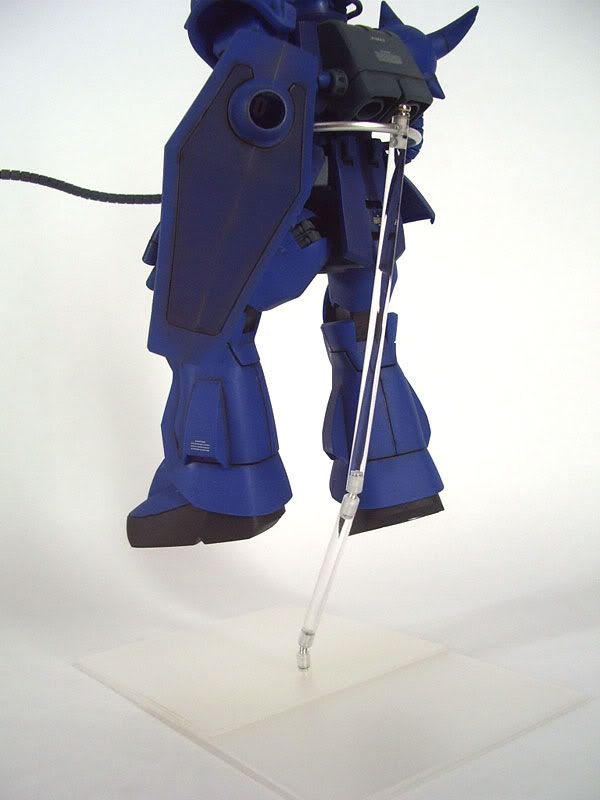
With a HG 1/144 Dreadnought.
Front:
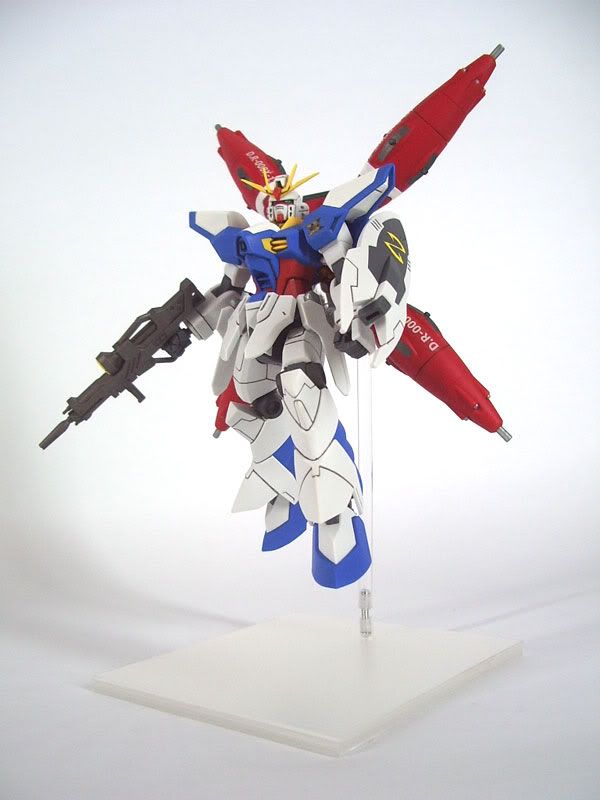
Back:
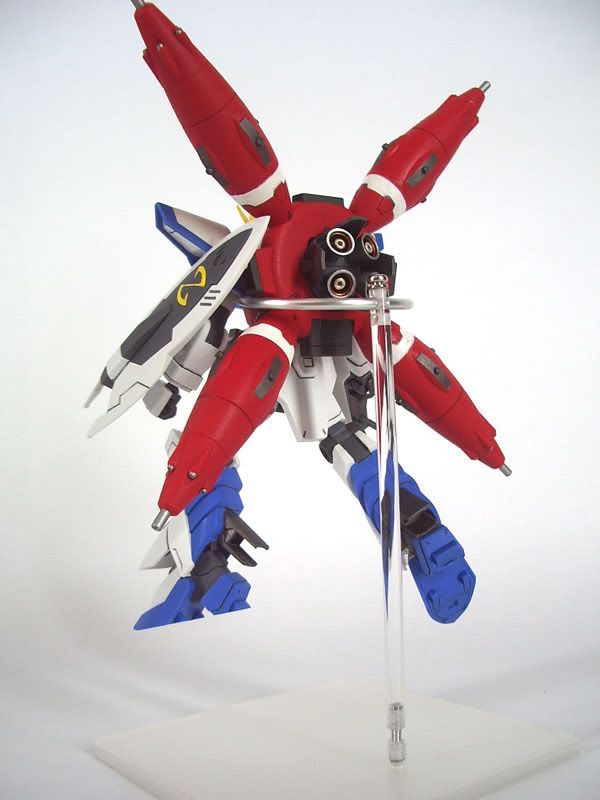
The Dreadnought has one of the oddest looking backpacks and the torso grip has no problem holding the mecha in place.
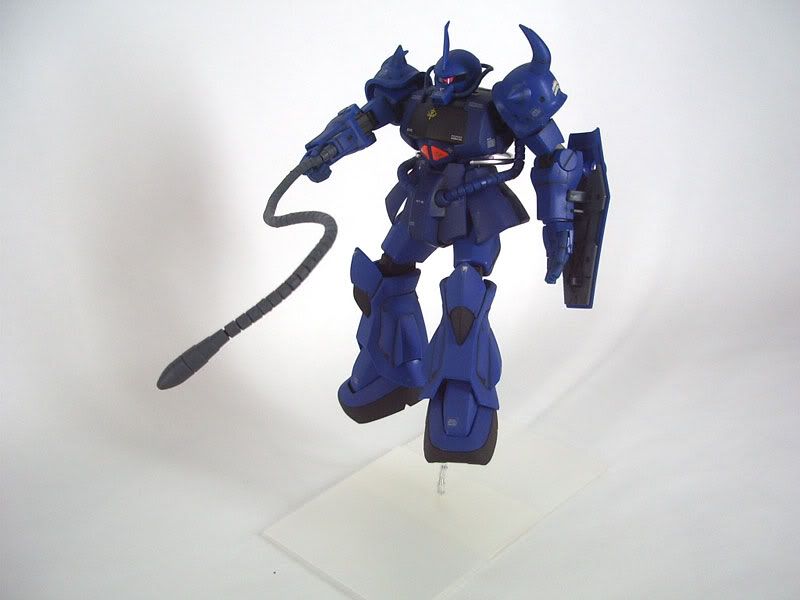
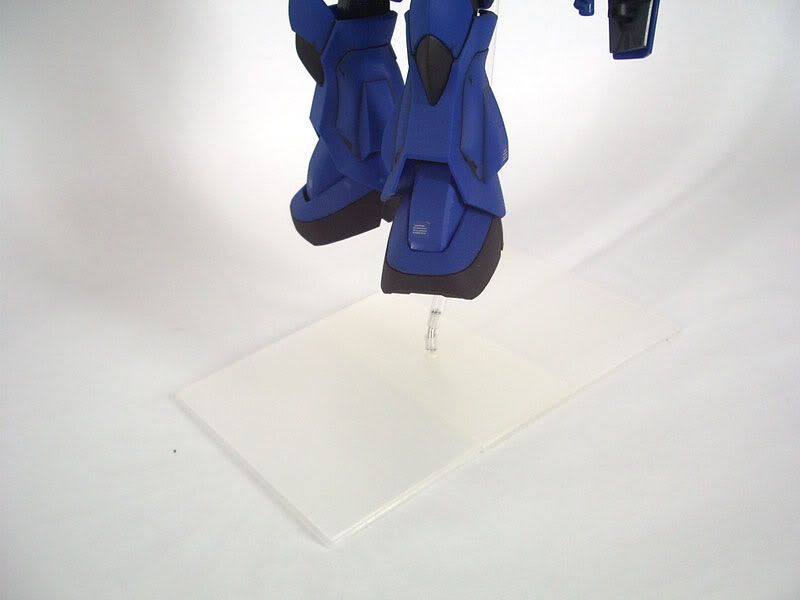
With an MG 1/100 Gouf.
Front:
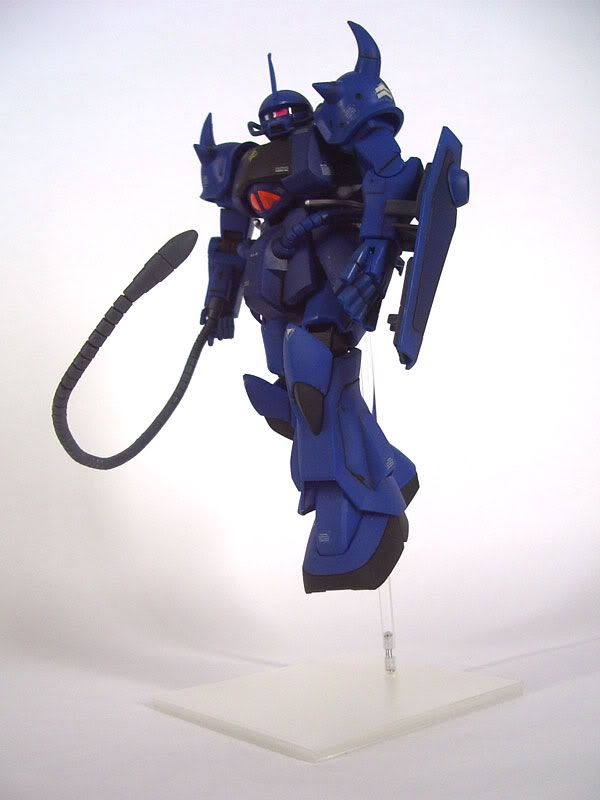
Back:
The shorter attachment(60 mm) of the spine can be easily added to extent the spine for 1/100 scaled kits.
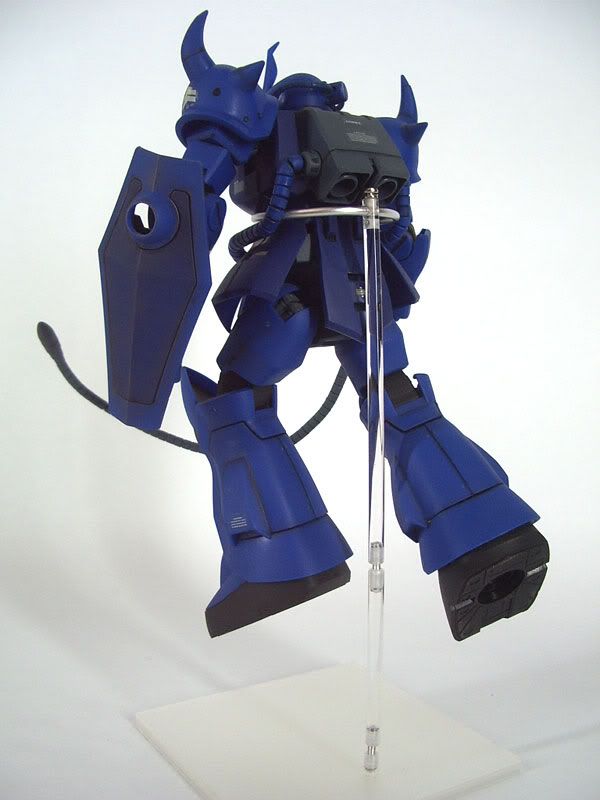
Sample of a kit mounted on a different base arrangement.
Front:
Shown here is a Gouf mounted on the elogated base arrangement.
With this arrangement of the base, more support is provided for this back-leaning pose.
Back:
The spine is also adjusted with ease.
Base:
The nexustand version 3.0 is by far my most satisfactory version of the revolutionary nexustand.
--------------------Updates--------------------
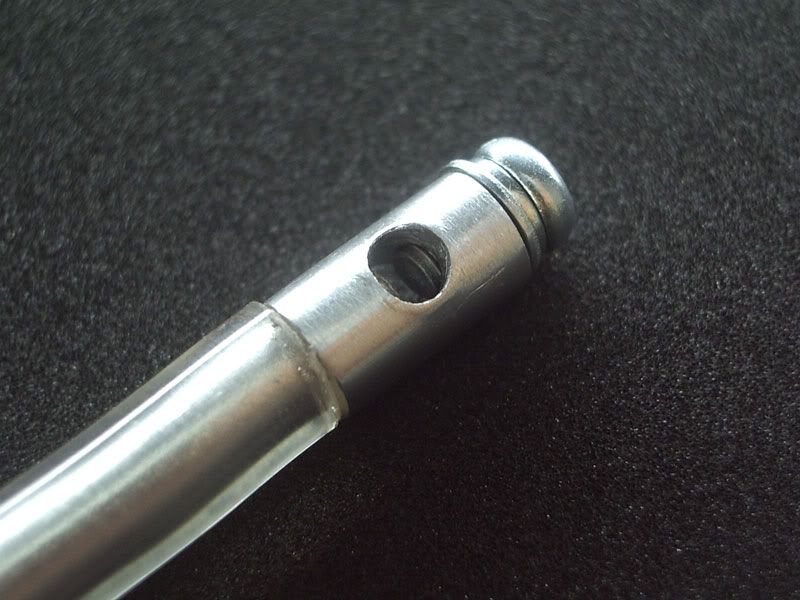
All Aluminium Torso Grip
Managed to buy a 1 foot long 6mm aluminium rod.
Gonna use it to construct the main part of the torso grip.
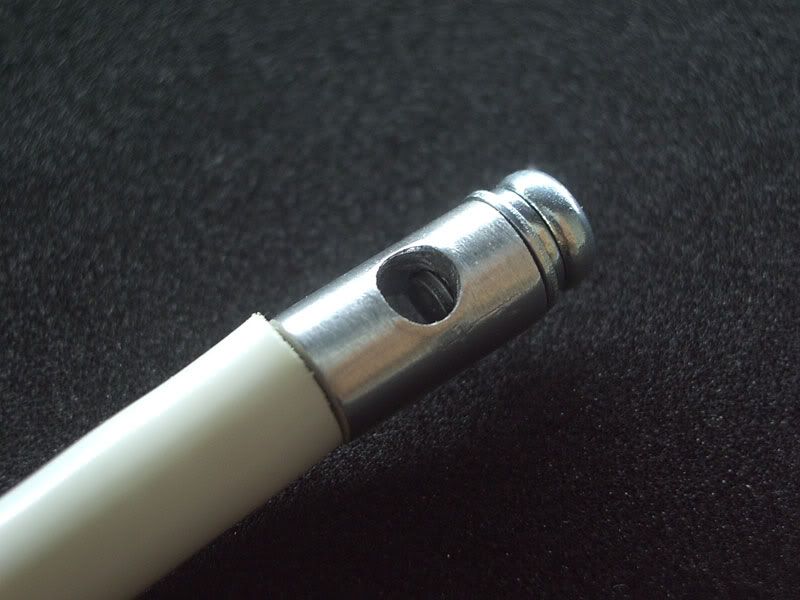
Attached to a transparent bendy wire.
Attached to a white bendy wire.
The new Torso Grip.
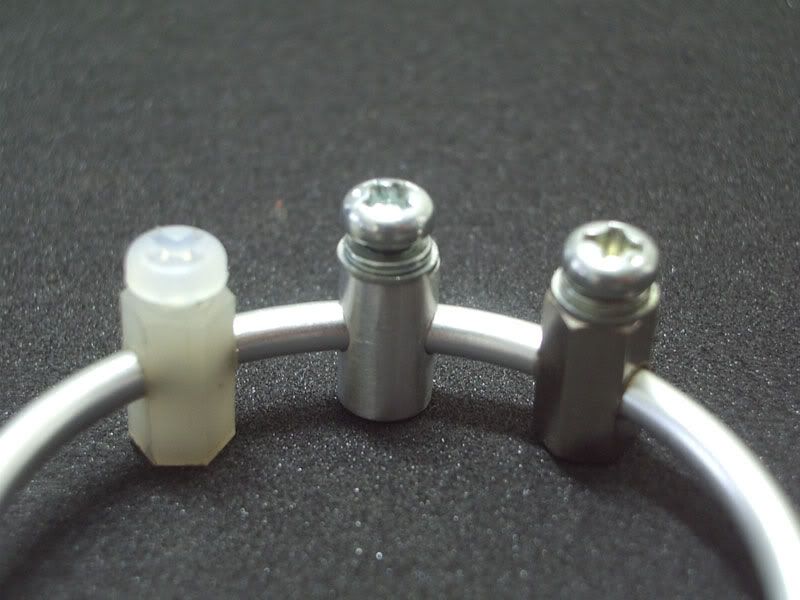
Then I went to Sim Lim Tower and bought these at 30cents each.
The center one is handmade from a 6mm aluminium rod(very xiong).
The left one is made of plastic(it has good traction against the aluminium loop but doesn't look too good).
The right one is made of brass coated with chrome(looks good but difficult to bore the 3mm horizontal hole).
Then I began to miss how I used to innovate my nexustand.
So, let's get right to it.
I want it to have:
- a poseable spine but not by using the bendy wire.
- a more secure base-to-spine connection.
- a thicker base(preferably 3mm & abv).
- a less bulky looking torso grip.
Materials used:
- PP foam(translucent white)
- acrylic stick(5mm diameter)
- aluminium wire(3mm)
(click on images to enlarge)
Making the spinal joints:
A 3mm screw tap & die was used to make these joints.
It gave me sore fingers after trying to do precision drilling on the ends of the acrylic sticks and threading the aluminium wire.
The spinal joint unit:
A small allowance needs to be given in between the sticks so that the aluminium wire can be bent.
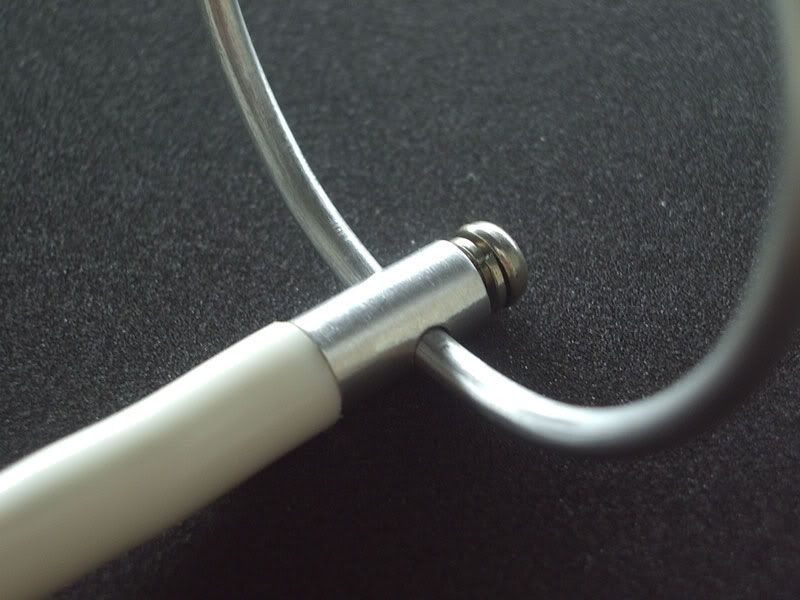
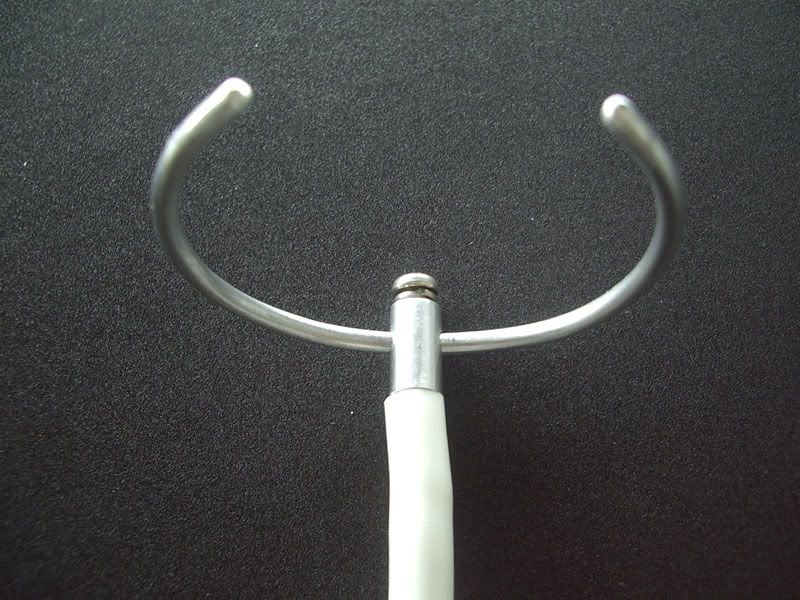
The torso grip:
It was a simple design but extremely difficult to realise.
The horizontal hole(3mm) for the aluminium wire and the vertical hole(3mm) for the screw forms a T-junction kinda tunnel.
The spine is only of 5mm in diameter.
This weakens the architecture of the torso grip.
The structure broke once, hence the original design is now about 1cm shorter.
In future, a 6mm diameter acrylic stick would be used(it only costs 10cent more).
*note: the extra hole in the spine is part of another torso grip design which failed miserably as it was too stiff to manipulate and too difficult to insert*
The base:
The base is a 4 ply PP foam design, each ply is 100 x 100 x 1.2 mm.
Why 4 ply?
This thickness(4.8mm) gives a good sturdy support for the base-to-spine connection.
Also a thicker base is more aesthetically pleasing.
Why only 100 x 100 mm?
This stand is intended for use with both 1/100 and 1/144 gunpla models.
Hence a base of this size would look proportional when displaying these model kits.
Of course, stability is considered too.
(Actually, the main reason why it's 100 x 100 mm is because the raw material comes in the form of a 200 x 700 mm board and cutting it into 100 x 100 mm pieces is more convienent & economical.)
Rotational designs:
Since it's 4 ply and only joined in one spot......why not rotate the pieces around and see what shapes you can get?
Elongated base:
One of my favourites.
Great for mechas with long and big ass rifles.
The nexustand version 3.0 (NSLP-V30A):
This arrangement of the spine is suitable for 1/100 kits:
Approx height: 180 mm
This arrangement of the spine is suitable for 1/144 kits:
Approx height: 120 mm
Flexibility:
Because the spinal joints are aluminium, the spine is poseable.
The torso grip wire is also bendable.
The pitch of the torso grip can also be adjusted by loosening and tightening the screw.
With a HG 1/144 Dreadnought.
Front:
Back:
The Dreadnought has one of the oddest looking backpacks and the torso grip has no problem holding the mecha in place.
With an MG 1/100 Gouf.
Front:
Back:
The shorter attachment(60 mm) of the spine can be easily added to extent the spine for 1/100 scaled kits.
Sample of a kit mounted on a different base arrangement.
Front:
Shown here is a Gouf mounted on the elogated base arrangement.
With this arrangement of the base, more support is provided for this back-leaning pose.
Back:
The spine is also adjusted with ease.
Base:
The nexustand version 3.0 is by far my most satisfactory version of the revolutionary nexustand.
--------------------Updates--------------------
All Aluminium Torso Grip
Managed to buy a 1 foot long 6mm aluminium rod.
Gonna use it to construct the main part of the torso grip.
Attached to a transparent bendy wire.
Attached to a white bendy wire.
The new Torso Grip.
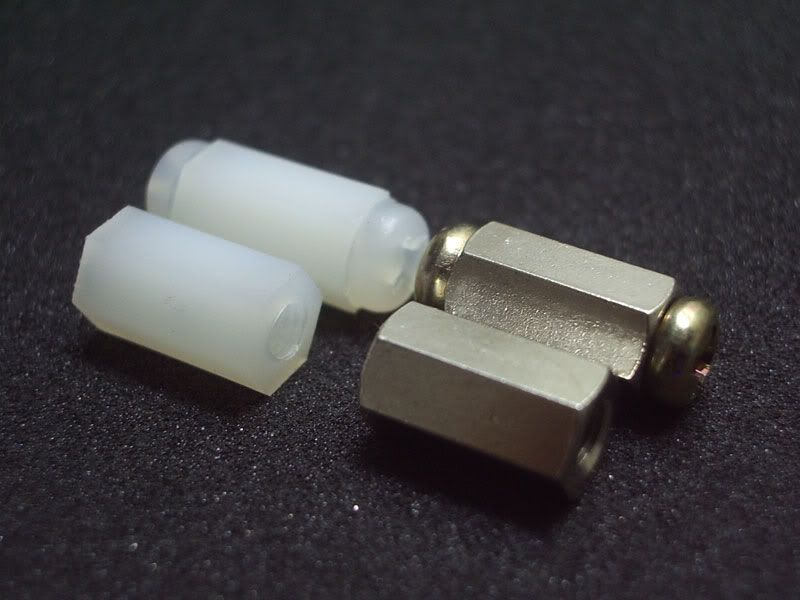
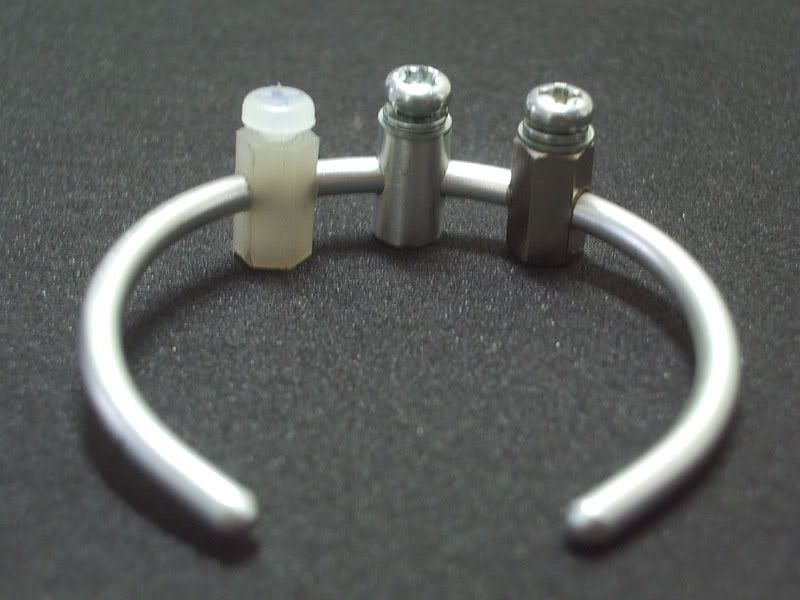
Then I went to Sim Lim Tower and bought these at 30cents each.
The center one is handmade from a 6mm aluminium rod(very xiong).
The left one is made of plastic(it has good traction against the aluminium loop but doesn't look too good).
The right one is made of brass coated with chrome(looks good but difficult to bore the 3mm horizontal hole).


Comments
Concept is fabulous too!
Nexustand ver.3 is so far the best looking stand.
Acrylic rod from Art Fiend?
Is it necessary to do screw-threads in bendy rod and acrylic rod? I was thinking if it will be easier to do the different assemblies with 'slot-in' mechanism.
A revision of version can include more segments, so that more challenging flights stance can be achieved.
I've experienced a couple of times(during my failed attempts in the torso grip) to squeeze in an alum wire into a slightly smaller hole and it cracked/split the acrylic rod. Sibei sad. Maybe use 6mm rod wud be better.
more segments xiong leh.
u try urself lah,haha
they r masterful...and at most nimble.
What more can I say,
Mr Craft Master!