WIP: XiaoBaiLong - Freedom Gundam
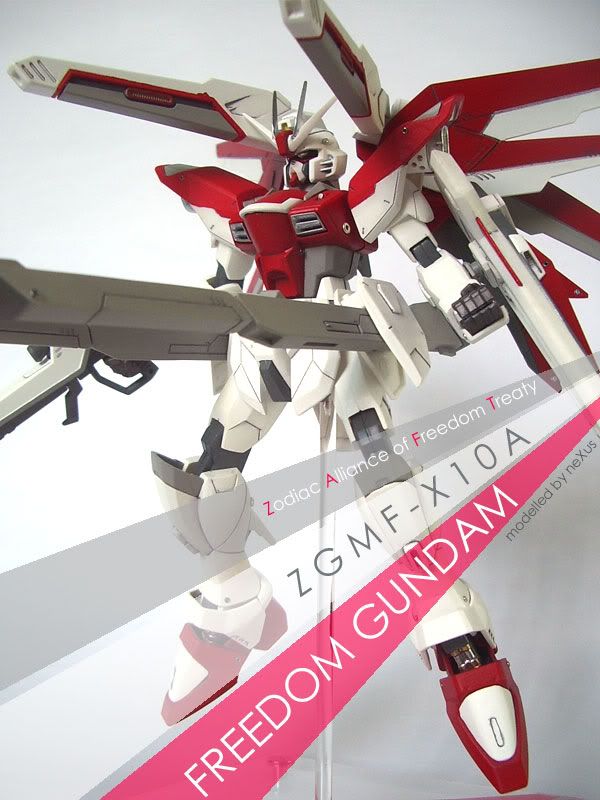
Xiao3 Bai2 Long2 - Zi4 You2 Zhan4 Shi4 is a NG 1/100 recasted model kit of the famous ZGMF-X10A Freedom Gundam by Bandai.
(click on images to enlarge)
The box:
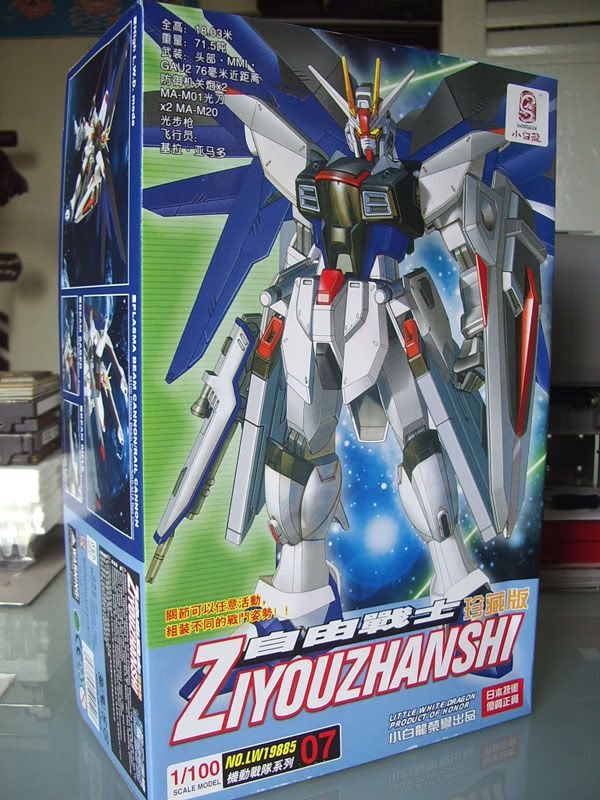
It definately looks better than a GD Model kit.
It has its own logo (top right-hand corner) and customised stickers that secures the bottom of the box.
The contents:
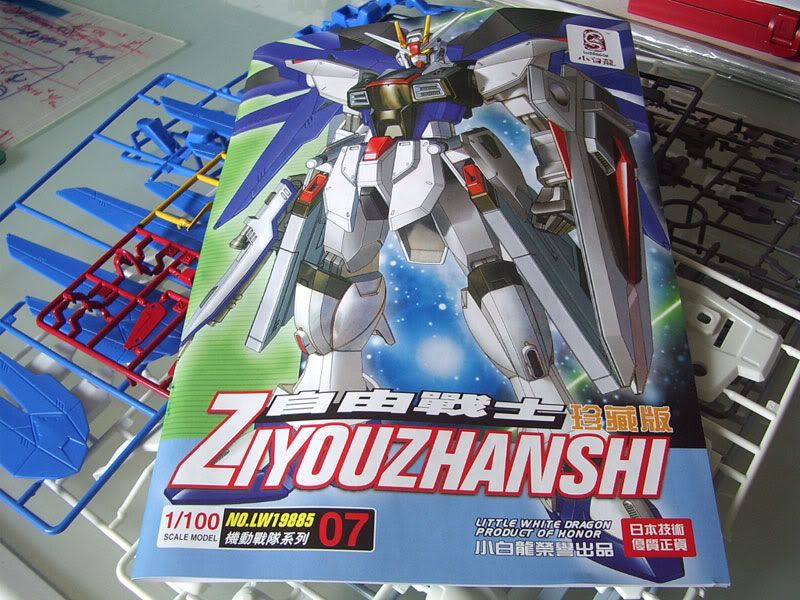
Yes! It does comes with an instruction manual booklet.
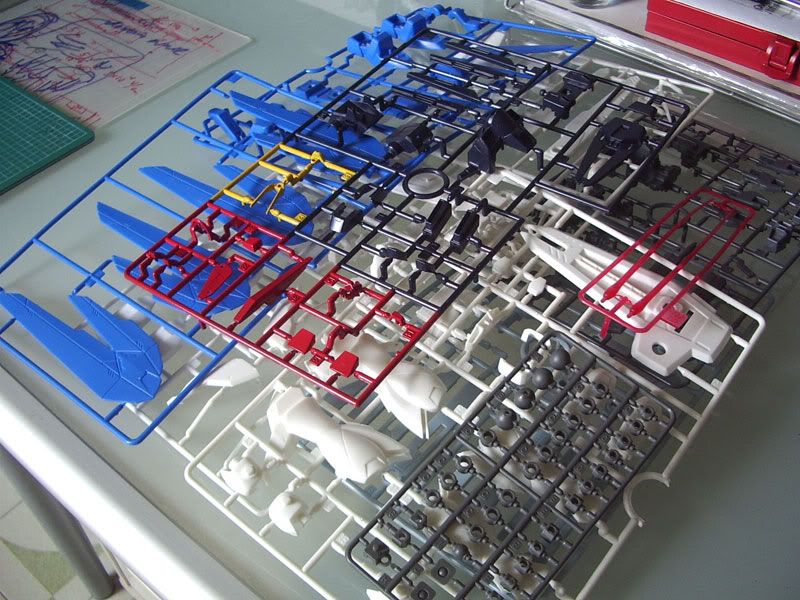
Upon closer inspection, the red and yellow trees are actually painted over by their respective colors.
Paint removal:
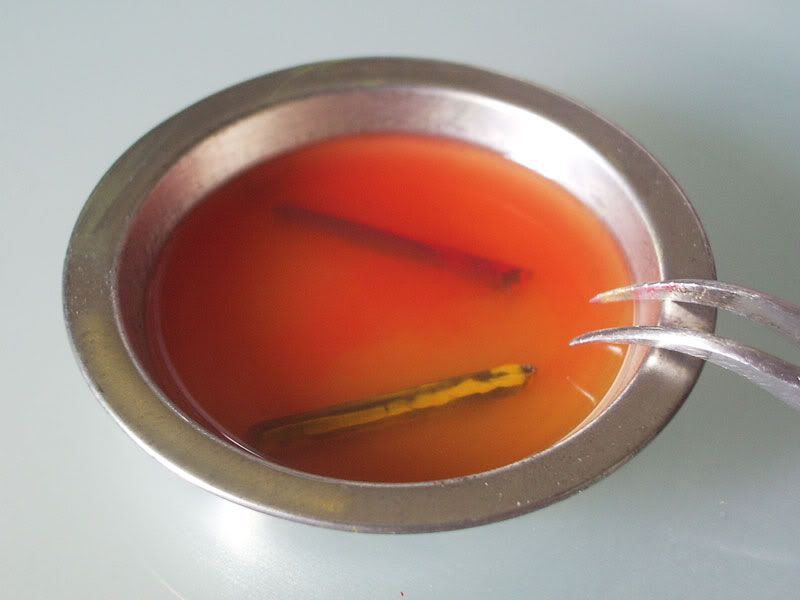
I poured some tamiya thinner out onto a small dish, cut out two small sections of the red and yellow trees and dropped them into the dish.
The paint comes off rather easily to reveal the base color.
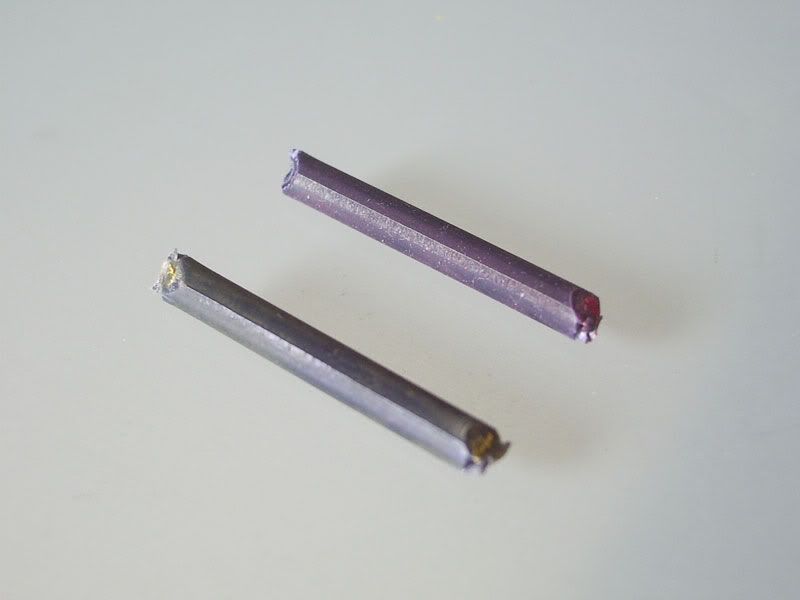
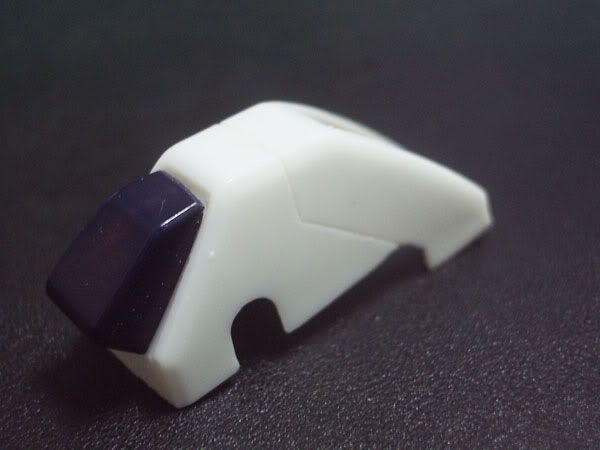
Dark blue undercoat:
The head:
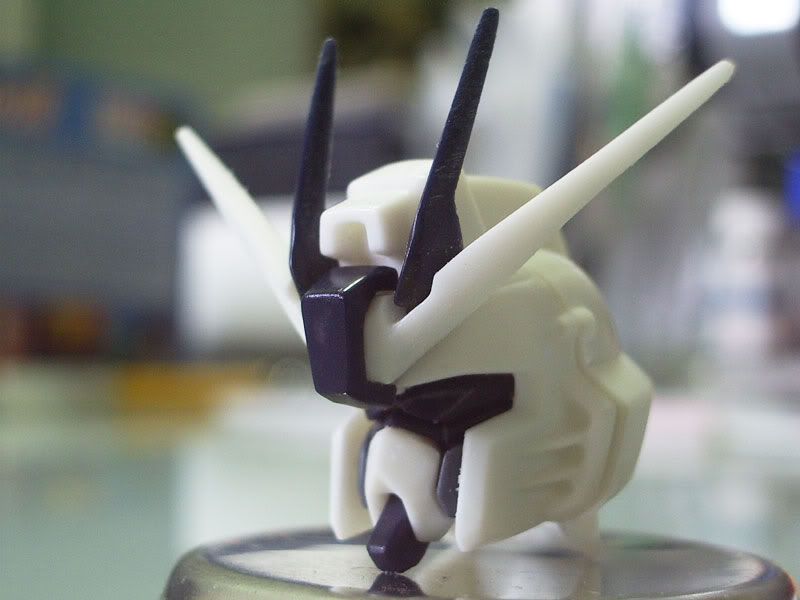
The head of a gundam is the most important part of a kit.
If its shape ain't well defined, the entire kit wouldn't look good too.
Large gaps:
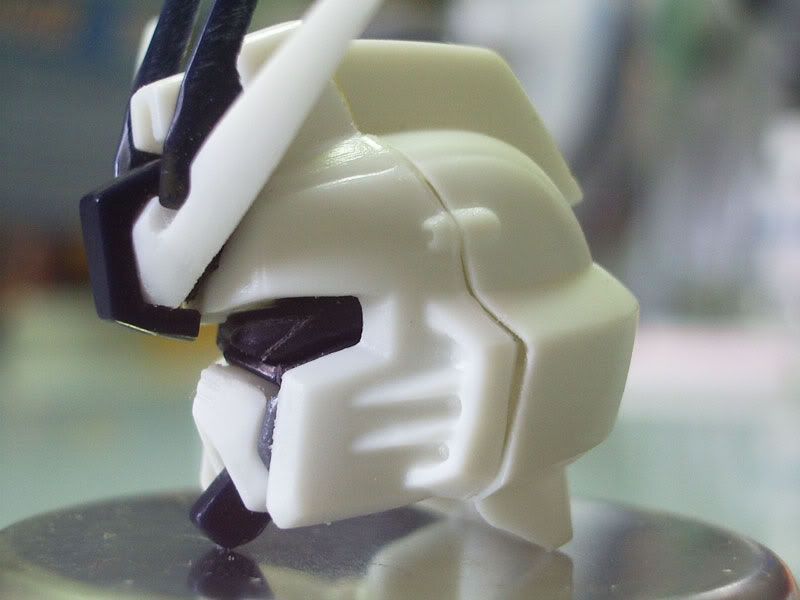
These gaps would need to be filled with tamiya putty and sanded down to shape.
In the meantime, the V-fins were sharpened.
Fresh from the trees:
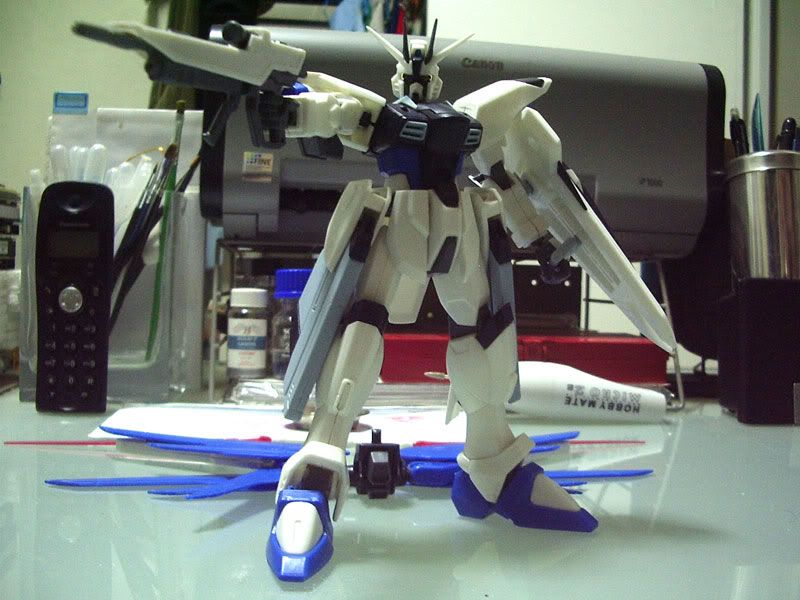
Not too bad lah, the two halves of a single unit are able to join together tightly but with the expected occasional gaps/seams.
At least it is able to stand up and hold up its rifle.
Since this is a recast kit, I might as well try out various modifications(some that I've observed online) on it.
I shall be attempting:
- cutting & adding plaplates(or rather styrene from evergreen)
- panel line scribing
- recoloring
- adding rivets(using beads)
Modding the plasma beam cannons:
Ok, the MG version of freedom gundam is able to adopt a pose in HiMAT mode while the NG versions cannot.
And that pisses me off.
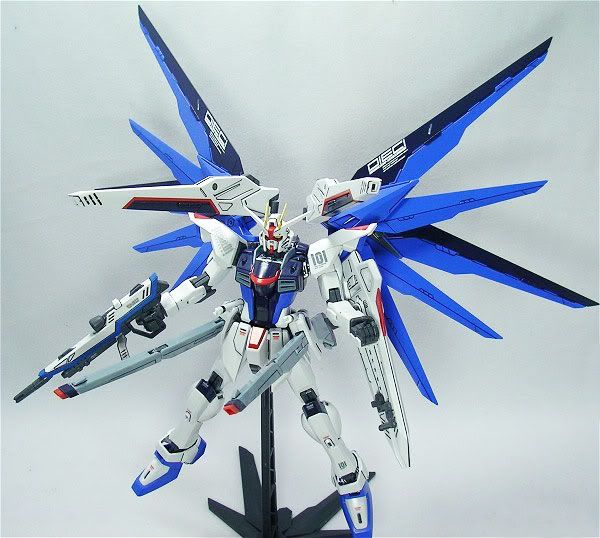
MG Freedom Gundam in HiMAT mode:
Hence, I shall attempt to mod my beam cannons to look similar to that of the MG's.
An original non-HiMATable beam cannon:
Where to cut:
After scrutinising the beam cannons of the MG kit, I picked my point of incision on my beam cannon and used a pencil to draw out the lines that would be cut.
Scribing with needle:
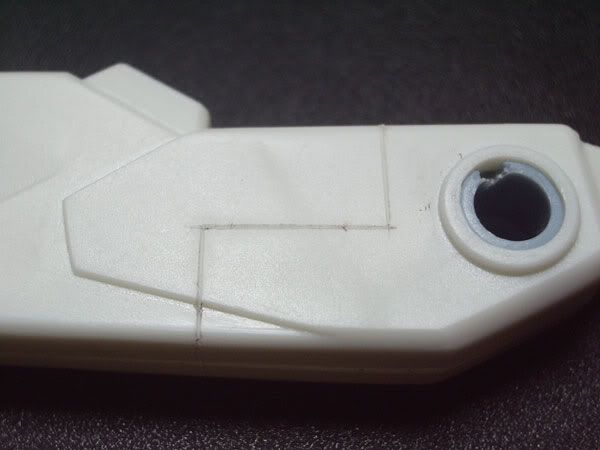
Then a needle and ruler were used to scribe out the initial lines on the plastic.
Deepening the lines:

Then a hobby knife was used to make repeated cuts to deepen the lines.
Separated:
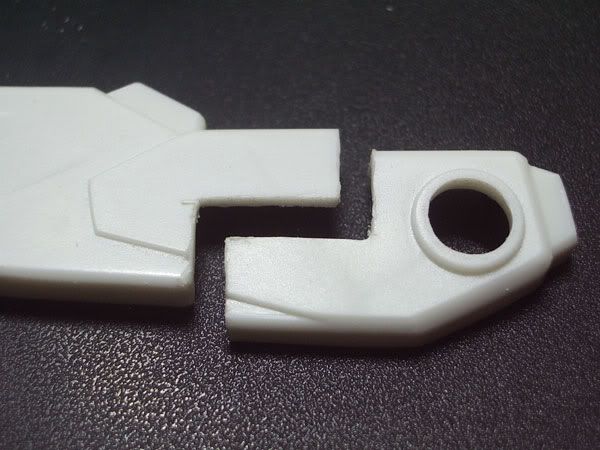
Eventually the two segments were separated.
Recycling PC parts:
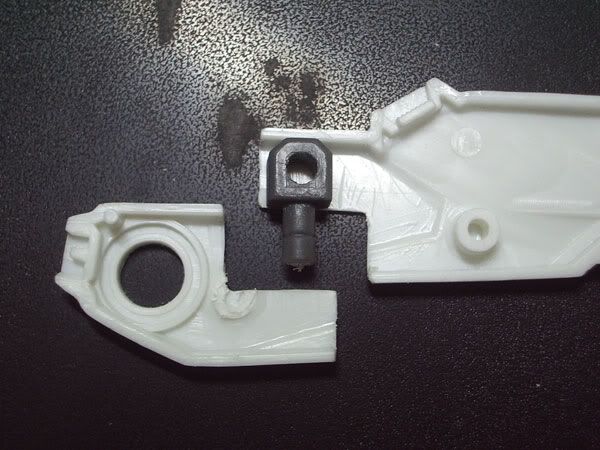
A spare part from the PC tree was then added to act as a pivot for the cannon to rotate outwards.
The hollow shells:
The segments were fitted together and sanded down.
But they look kinda hollow. Putty shall be used to fill em up.
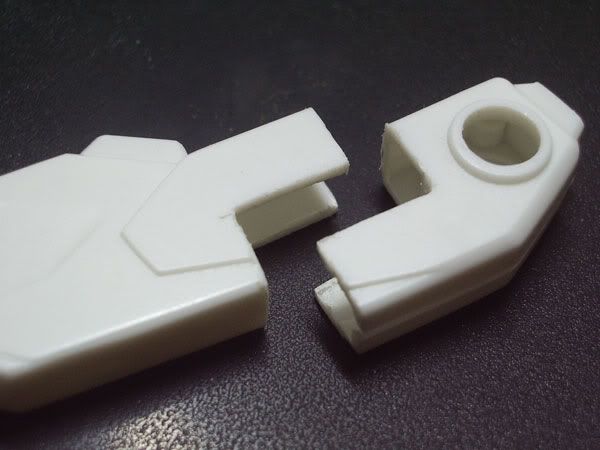
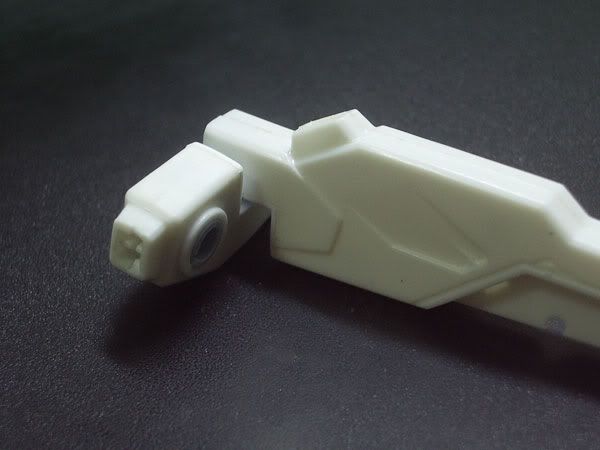
How to attach:
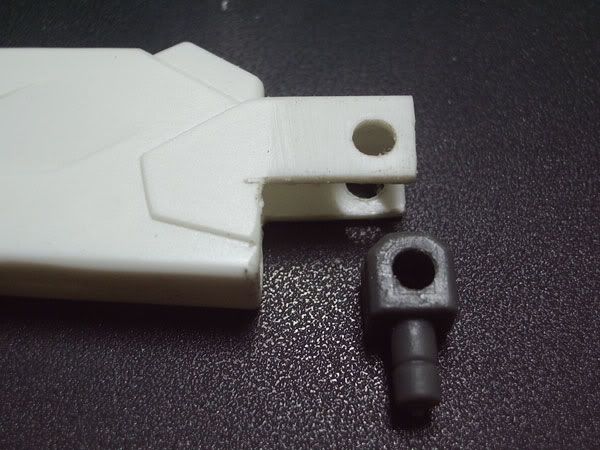
A hole was bored thru to allow the pc part to be secured in place.
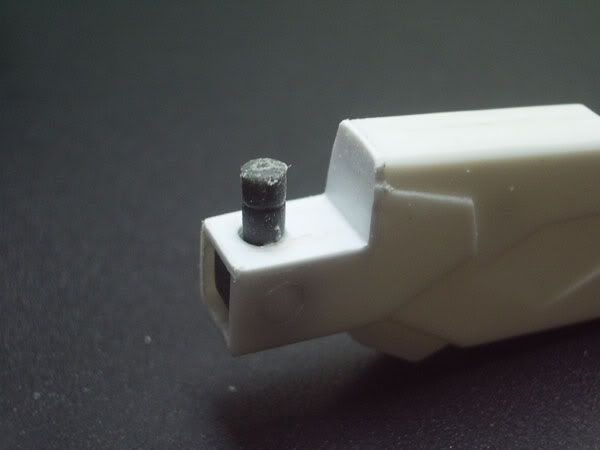
Another spare part:
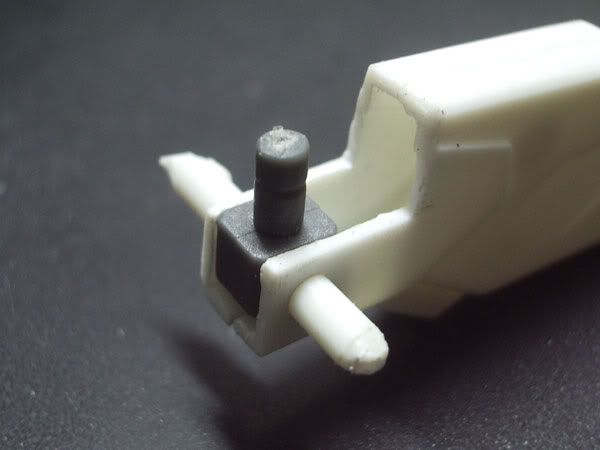
Then a short segment was cut from the remainder tree to be used as an axis.
Flushing the axis:
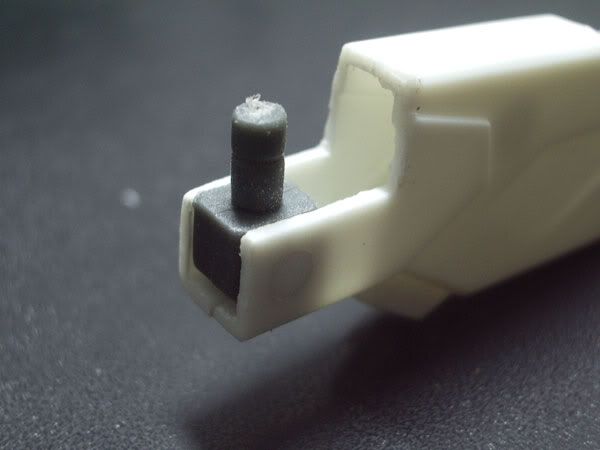
Then it was cut and filed down until it is flushed with the surface of the cannon.
Plan A:
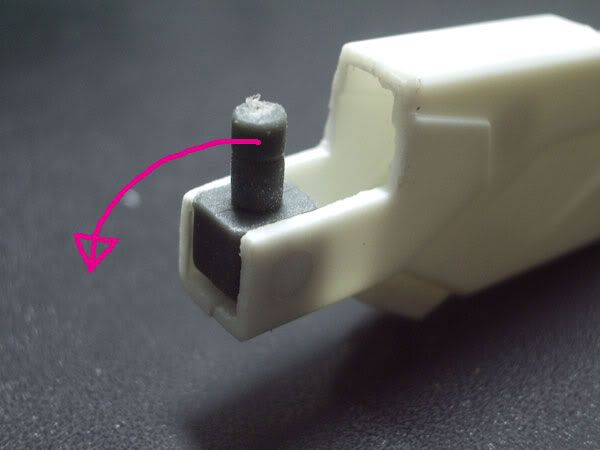
Initially, the plan was to allow the cannon to be able to rotate outwards(to achieve HiMAT) AND tilt up & down(in the direction of the pink arrow).
But because there wasn't enough clearence between the bottom of pc part and the interior of the cannon, the tilting action would cause the cannon to expand at the seams(which is not such a great idea).
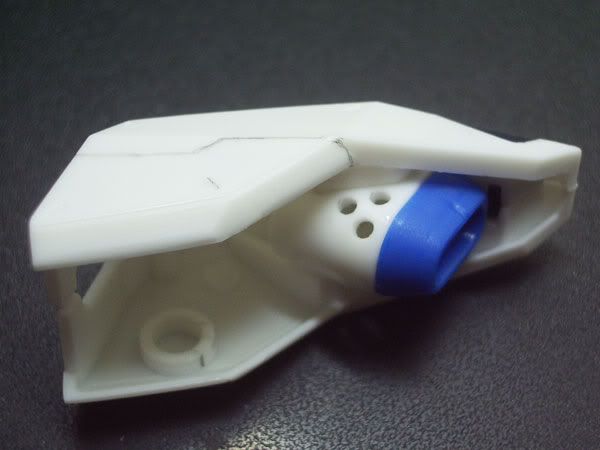
Plan B:
Hence, some styrene sheets(0.5mm thick) were cut and shaped to seal up the hollow regions.
*Note: the end of the cannon in this pic wasn't covered up but the completed one was.
End of the day, the cannons wouldn't be able to tilt up.
Filling the void:
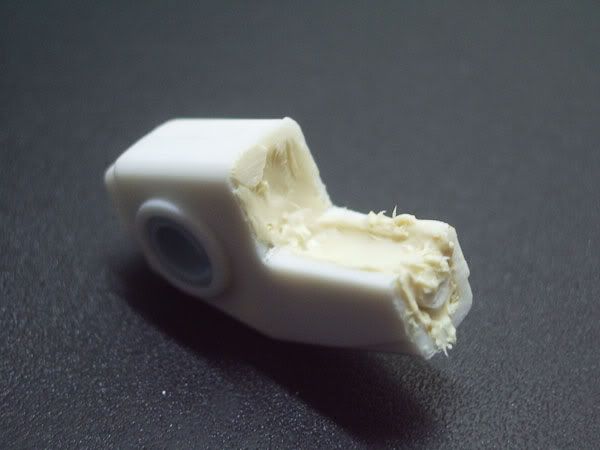
Peanut butter was then used to seal up the hollow spaces of the other segment.
By the way, if you look closely, you can see a piece of tree inserted at the bottom buried among the putty.
This was done because the putty simply took too long to cure and harden.
Completed & Test Fit:
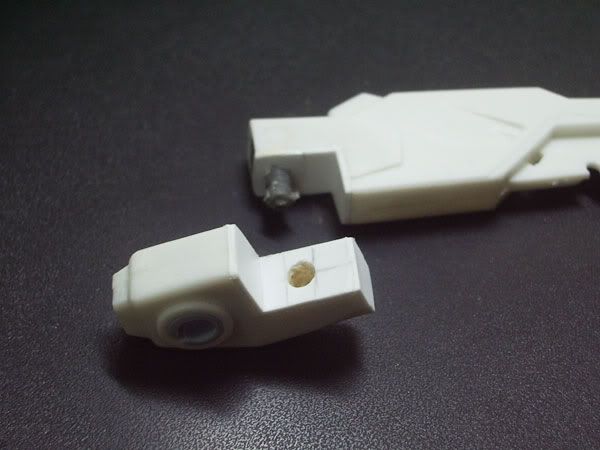
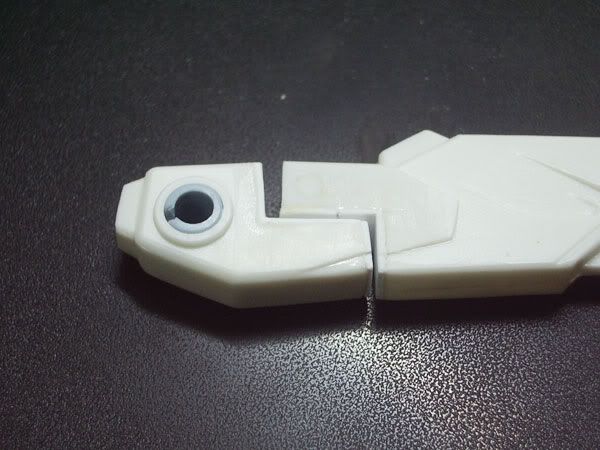
The gap between the two segments is to create an allowance for the rotation of the cannon.
Ok lah, it doesn't look fabulous right now but it doesn't matter also because it'll be hidden behind parts of the wings of the freedom gundam.
Rotation:
Fitted with its wings:
Together with the backpack & torso:
All together now:
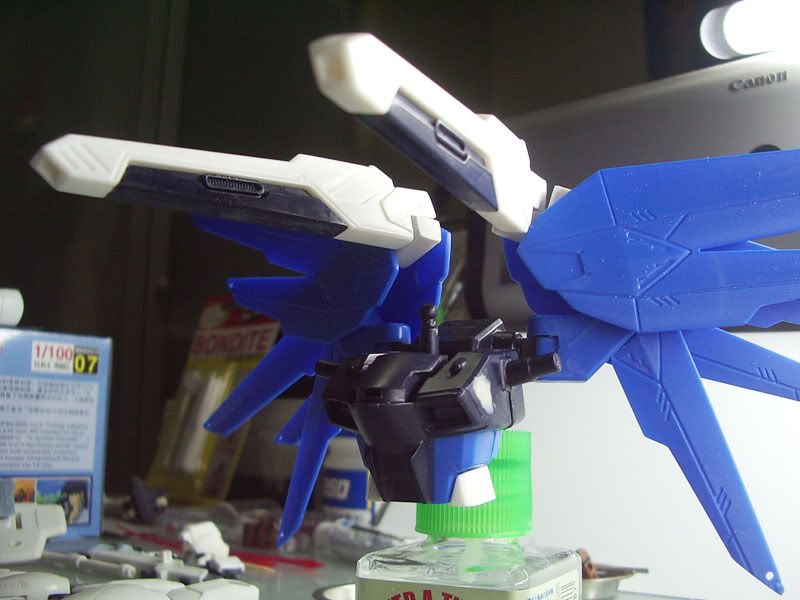
Not bad ei?
Make your own head vulcans:
After puttying up the gaps in the head, it seems to me that the head vulcans are not very defined.
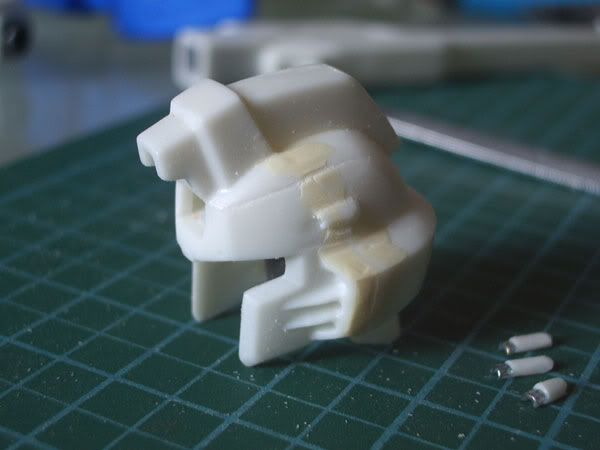
Splitting and filing:
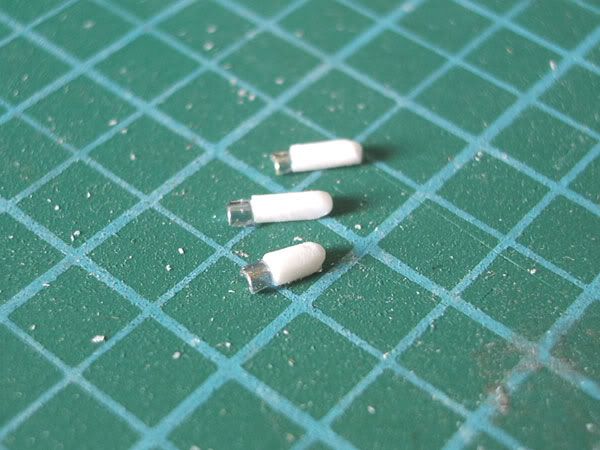
A glass bead was split in half using a hobby knife.
Then a segment of a tree was cut out and slowly filed down to size. It's kinda tedius but it can be done. The main part of the vulcan was painted first then blue tac(white ones) was use as an adhesive to secure the tip(half a bead) of the vulcan to the main part of the vulcan. Then together they were secured to the head using blue tac as well.
*But in the end, a whole bead was used instead because it looks better.
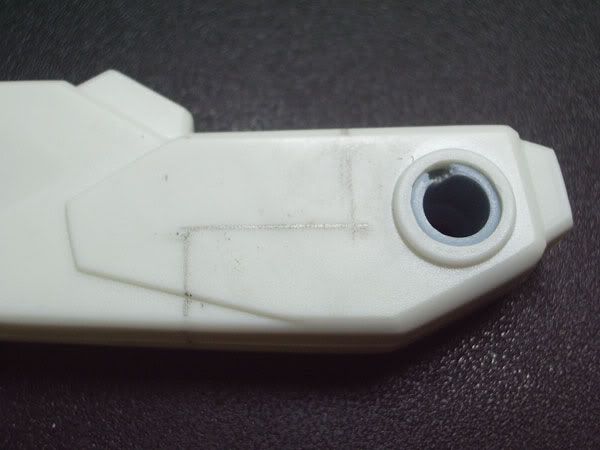
Scribing panel lines:
Followed the tutorial from here.
Details for the shoulder:
Used pencil to draw out my desired panel lines on the shoulder.
Then masked it up along the lines and use a needle to scribe out the lines.
Then I used an acrylic cutter to deepen the lines.
When I'm done, the surface was filed down using a fine grit sandpaper.
New panel lines:
This is another part, didn't really have much progress pix for the whole process.
Recoloring for the poor man:
I ain't got no airbrush & compressor and using Mr. Hobby mini spray cans at 10bucks a pop is way too costly.
So I turned to using industrail spray paints. They cost s$3.50 a can and they come in bigger cans of course. The only problem with them is that the paint is quite coarse and it is very hard to achieve a smooth finish. So I'd be spraying from a greater distance(misting).
Choice of colors:
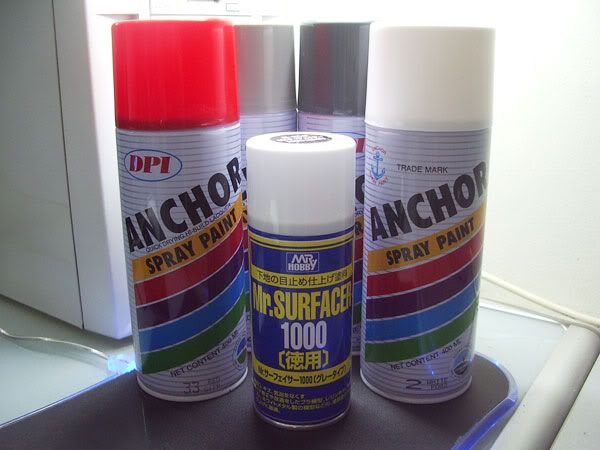
ANCHOR Red, White, Pale Grey, Dark Grey(S$3.50 each) and a Mr. Hobby primer(S$11.90!!!)
Test trial:
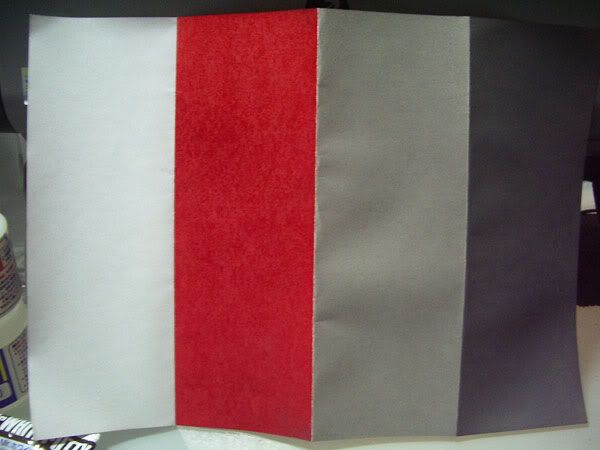
Tested the four main colours on a piece of paper to see if the colors complement one another.
Photoshop time:
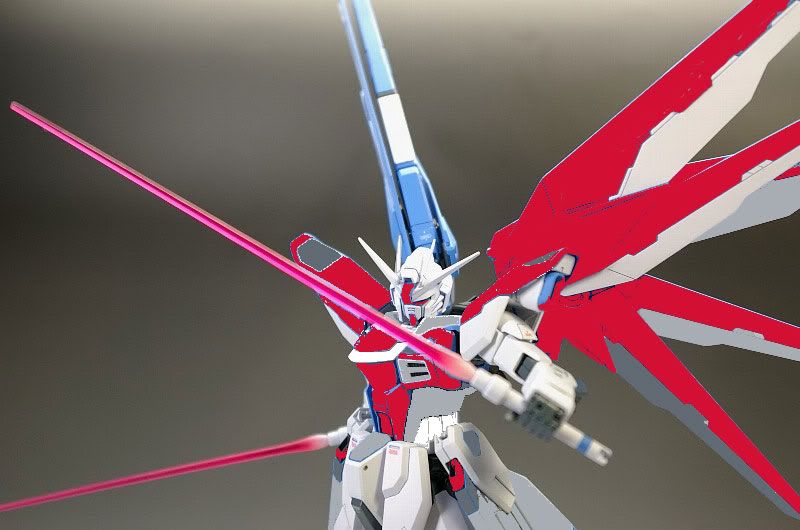
To give me a feel of what it could look like, the above image is a briefly photoshopped pic of a color scheme which I intend to do.
Priming the parts:
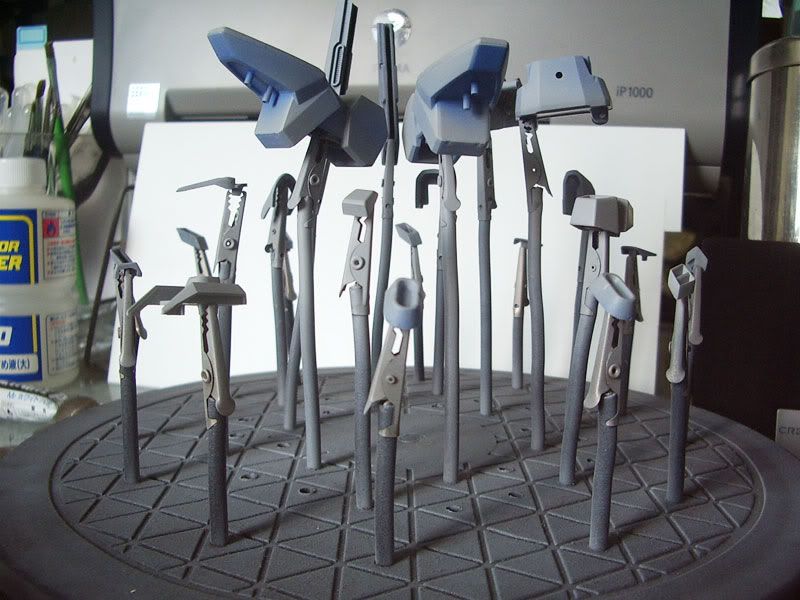
Dark colored parts must be prime before painting since I'm attempting to recolor them.
The Hangar24 is a great help for spray painting jobs.
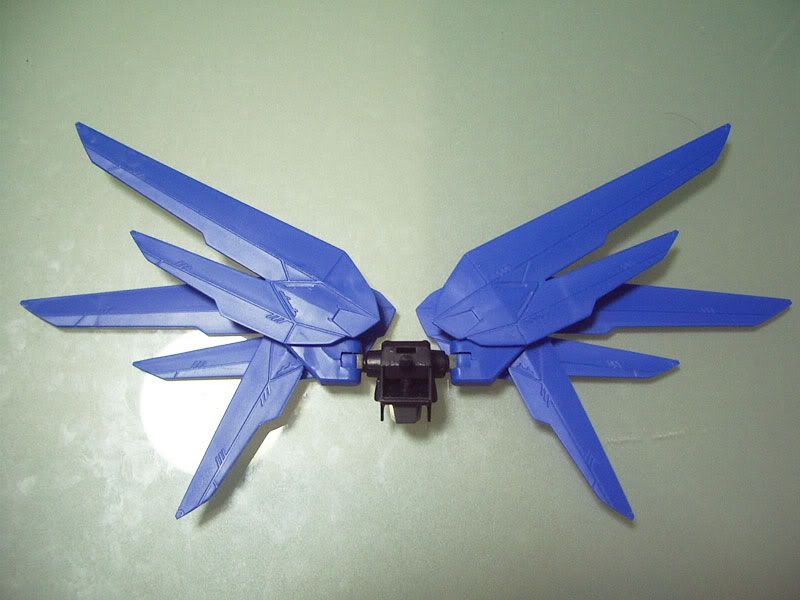
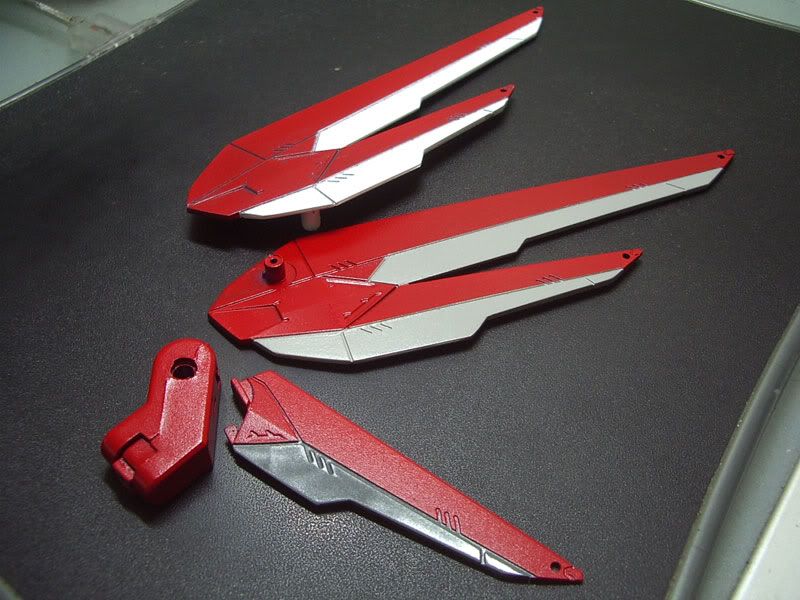
Preview of the wings:
Adding beads:
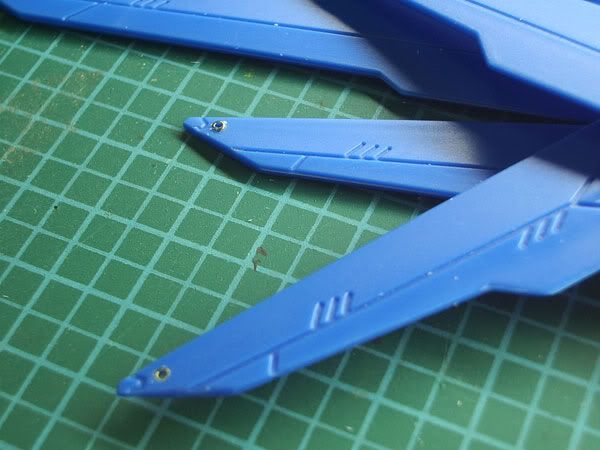
I did said that I'm gonna be putting the beads to good use, didn't I?
A brief look on how the beads are added to strategic parts of the kit.
Making your mark:
Use a sharp tool to make a mark on your selected spot.
This is to prevent your drill bit from slipping as you are drilling.
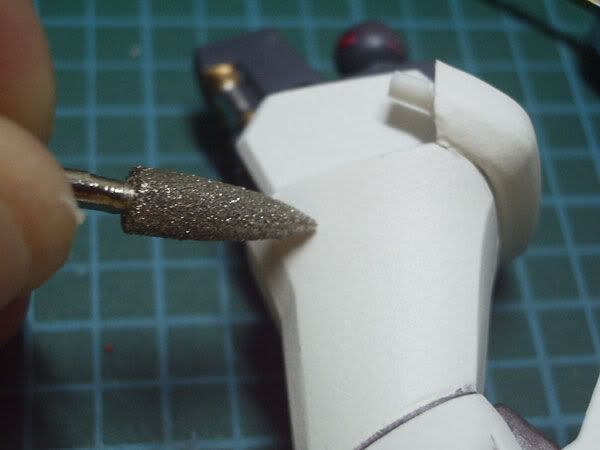
Boring:
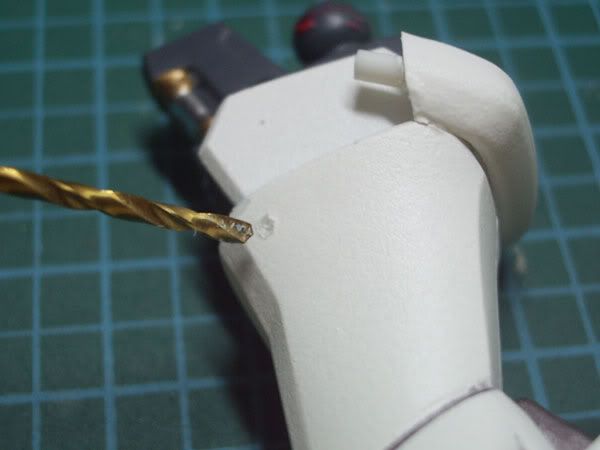
Depending on the size of your bead, bore a hole using a drill bit of a slightly smaller diameter and then file it down to size. This way, your bead would be able to fit snuggly in the hole without the use of any adhesive.
Fitting the bead:
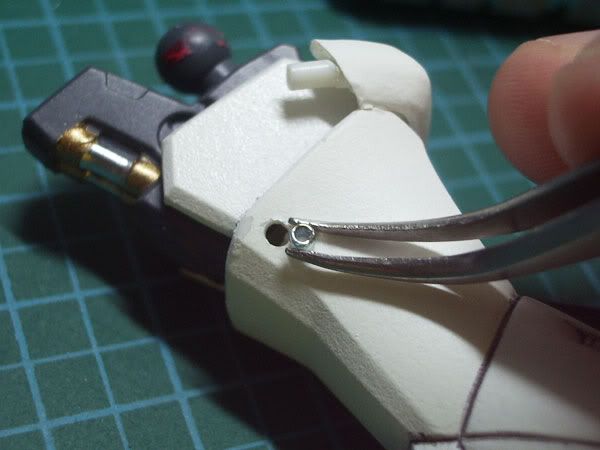
Use a pair of tweezers to fit the bead into the hole.
Not all the way in:
Use the back of your tweezers to push the bead into the snug fitting hole.
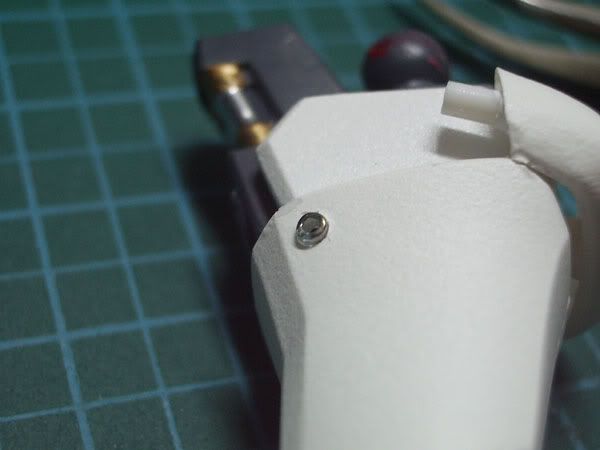
If the hole is very tight, it's probably not a good idea to use brute force to push it in because it may break the bead(it's made of glass) or crack your plastic.
The bead need not be push in all the way until it's flush with the surfce of the plastic, this is to give it a more natural look of a rivet or something.
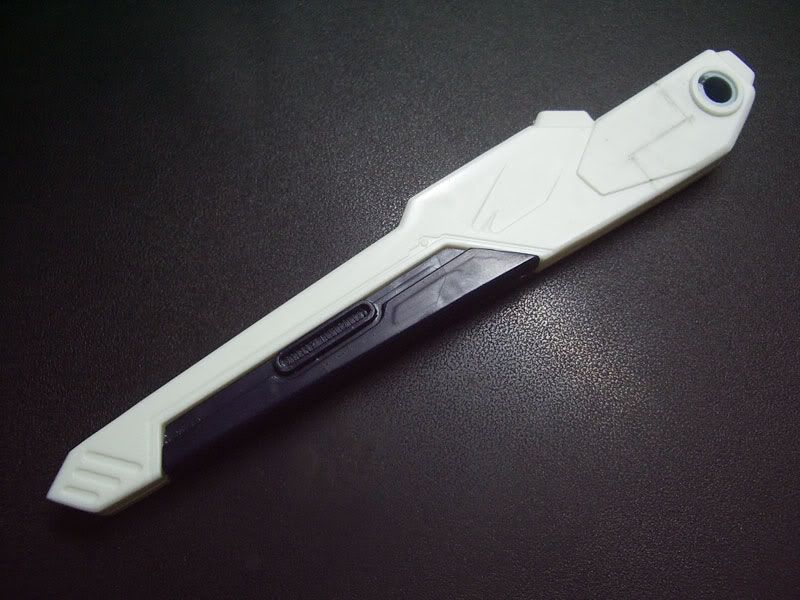
Making a stand:
Materials that I'd be using
- acrylic sheets(1.4mm thick,A4 size)
- acrylic stick(5mm diameter,1m long)
- special nut and bolt
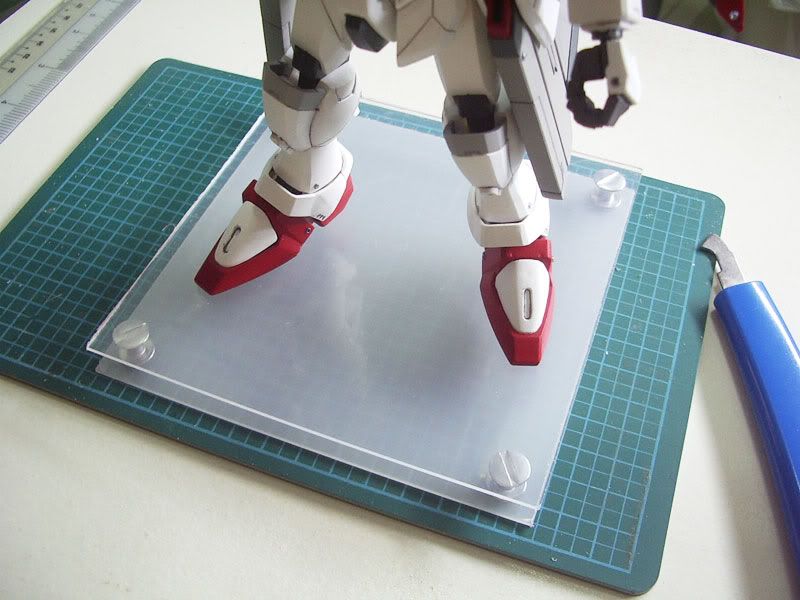
The base is made from two acrylic sheets, one on top of the other.
The top one is clear while the bottom one is translucent white.
The clear acrylic is elevated from the translucent white one but the four nuts & bolts mounted at the four corners.
The inital dimension of the base is 15 x 15 cm but due to inexperience with the acrylic cutting tool, the acrylic was cracked in various undesirable areas during the score & snap process.
So now it is 13 x 13 cm after some recovery work.
The base:
This is approximately how it'll look like.
By the way, the blue tool is the acrylic cutter.
The nut & bolt:
This is not exactly how it's gonna be placed. I'm just putting it in place to see how it looks and to plan where it should be mounted.
Drilling:
The nuts & bolts sizes were measured before marking out the positions of the holes on the base.
The center hole(5mm) is for the backbone of the stand.
Fitting time:

Connecting to the kit:
The usual method to stick a kit to the base is by using a stainless steel rod and poking it up the butt of the kit which has a suitable hole bored into it.
The diameter of the acrylic backbone(5mm) is simply too thick to initiate a hole to be bored in the butt of the kit. Hence a small hole is drilled into the backbone and a short segment of stainless steel in inserted into it. The other end of the rod would go into the butt of the kit.
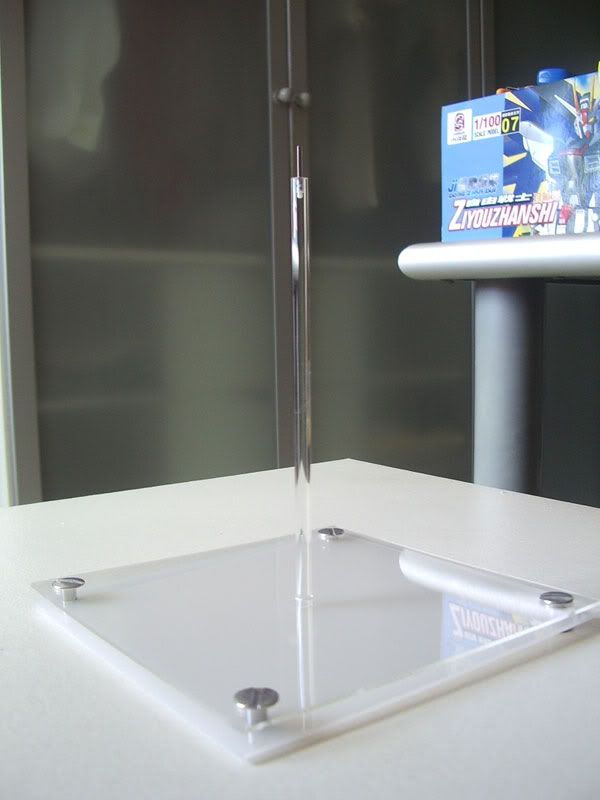
Completed stand:
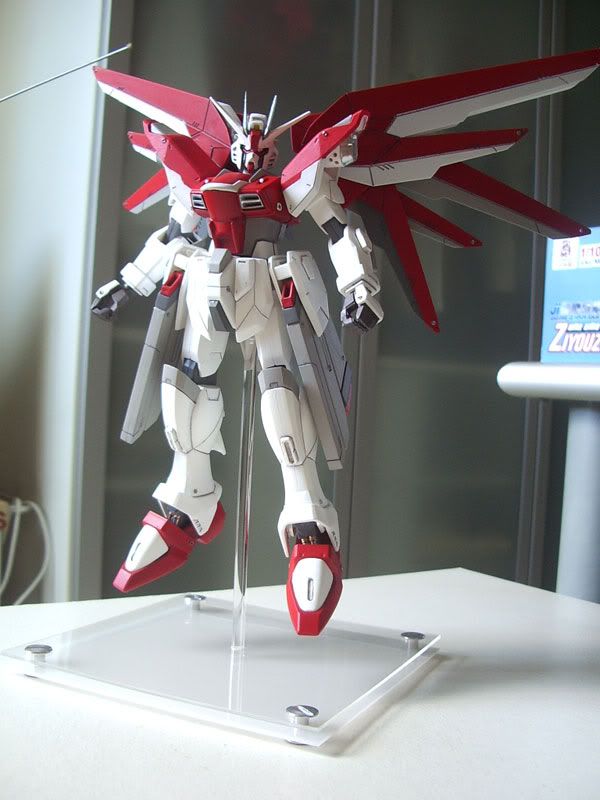
With the completed kit:
Too plain?:
A ZAFT word design was drawn and cut out from a tranparency. Then it was painted and glued to the underside of the clear acrylic.
Finalised:
Completion:

The complete gallery of XBL Freedom Gundam be viewed at Gundam Hangar.
(click on images to enlarge)
The box:
It definately looks better than a GD Model kit.
It has its own logo (top right-hand corner) and customised stickers that secures the bottom of the box.
The contents:
Yes! It does comes with an instruction manual booklet.
Upon closer inspection, the red and yellow trees are actually painted over by their respective colors.
Paint removal:
I poured some tamiya thinner out onto a small dish, cut out two small sections of the red and yellow trees and dropped them into the dish.
The paint comes off rather easily to reveal the base color.
Dark blue undercoat:
The head:
The head of a gundam is the most important part of a kit.
If its shape ain't well defined, the entire kit wouldn't look good too.
Large gaps:
These gaps would need to be filled with tamiya putty and sanded down to shape.
In the meantime, the V-fins were sharpened.
Fresh from the trees:
Not too bad lah, the two halves of a single unit are able to join together tightly but with the expected occasional gaps/seams.
At least it is able to stand up and hold up its rifle.
Since this is a recast kit, I might as well try out various modifications(some that I've observed online) on it.
I shall be attempting:
- cutting & adding plaplates(or rather styrene from evergreen)
- panel line scribing
- recoloring
- adding rivets(using beads)
Modding the plasma beam cannons:
Ok, the MG version of freedom gundam is able to adopt a pose in HiMAT mode while the NG versions cannot.
And that pisses me off.
MG Freedom Gundam in HiMAT mode:
Hence, I shall attempt to mod my beam cannons to look similar to that of the MG's.
An original non-HiMATable beam cannon:
Where to cut:
After scrutinising the beam cannons of the MG kit, I picked my point of incision on my beam cannon and used a pencil to draw out the lines that would be cut.
Scribing with needle:
Then a needle and ruler were used to scribe out the initial lines on the plastic.
Deepening the lines:
Then a hobby knife was used to make repeated cuts to deepen the lines.
Separated:
Eventually the two segments were separated.
Recycling PC parts:
A spare part from the PC tree was then added to act as a pivot for the cannon to rotate outwards.
The hollow shells:
The segments were fitted together and sanded down.
But they look kinda hollow. Putty shall be used to fill em up.
How to attach:
A hole was bored thru to allow the pc part to be secured in place.
Another spare part:
Then a short segment was cut from the remainder tree to be used as an axis.
Flushing the axis:
Then it was cut and filed down until it is flushed with the surface of the cannon.
Plan A:
Initially, the plan was to allow the cannon to be able to rotate outwards(to achieve HiMAT) AND tilt up & down(in the direction of the pink arrow).
But because there wasn't enough clearence between the bottom of pc part and the interior of the cannon, the tilting action would cause the cannon to expand at the seams(which is not such a great idea).
Plan B:
Hence, some styrene sheets(0.5mm thick) were cut and shaped to seal up the hollow regions.
*Note: the end of the cannon in this pic wasn't covered up but the completed one was.
End of the day, the cannons wouldn't be able to tilt up.
Filling the void:
Peanut butter was then used to seal up the hollow spaces of the other segment.
By the way, if you look closely, you can see a piece of tree inserted at the bottom buried among the putty.
This was done because the putty simply took too long to cure and harden.
Completed & Test Fit:
The gap between the two segments is to create an allowance for the rotation of the cannon.
Ok lah, it doesn't look fabulous right now but it doesn't matter also because it'll be hidden behind parts of the wings of the freedom gundam.
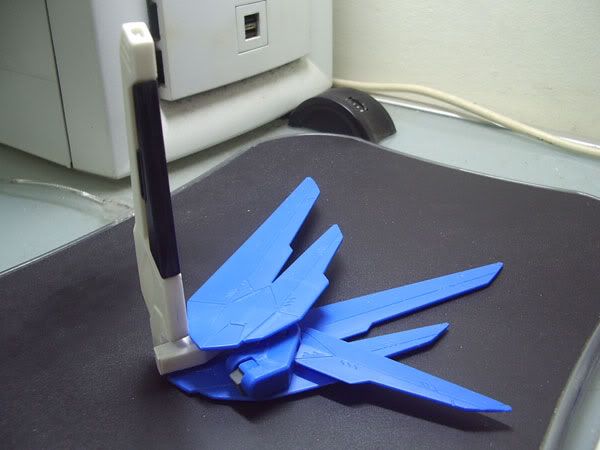
Rotation:
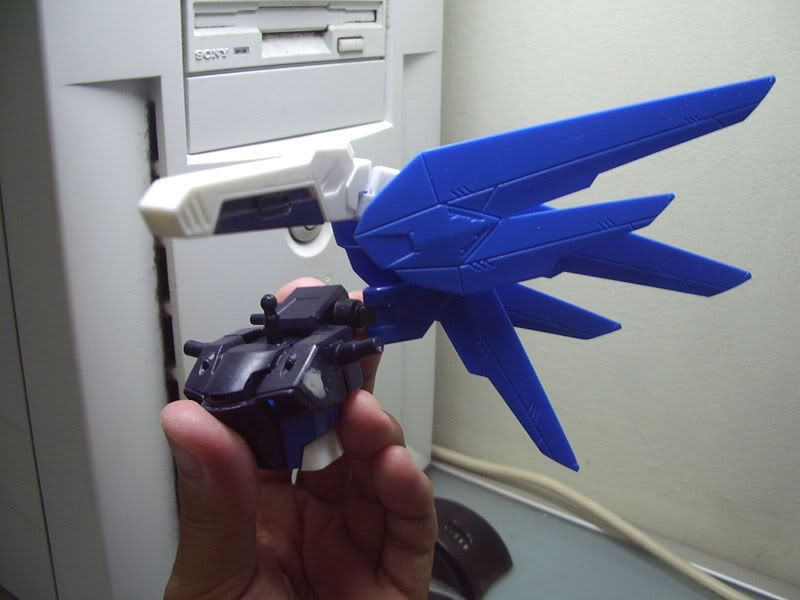
Fitted with its wings:
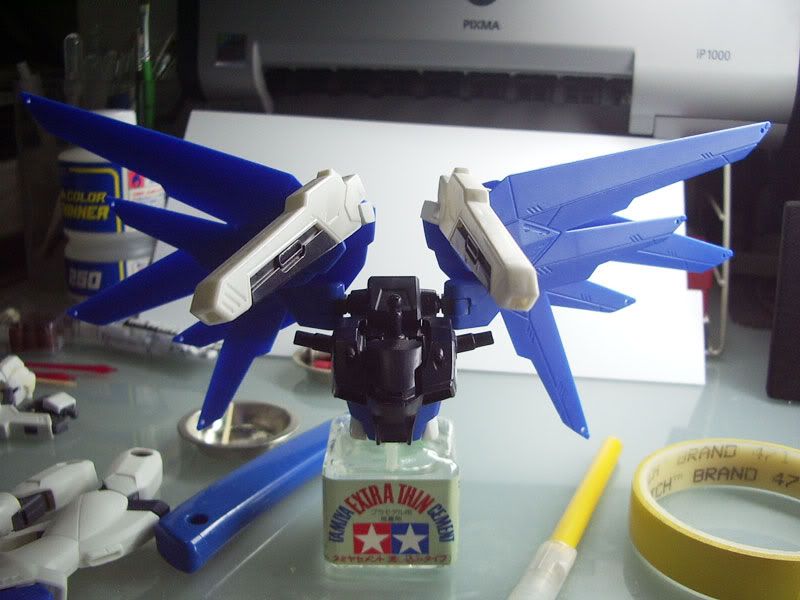
Together with the backpack & torso:
All together now:
Not bad ei?
Make your own head vulcans:
After puttying up the gaps in the head, it seems to me that the head vulcans are not very defined.
Splitting and filing:
A glass bead was split in half using a hobby knife.
Then a segment of a tree was cut out and slowly filed down to size. It's kinda tedius but it can be done. The main part of the vulcan was painted first then blue tac(white ones) was use as an adhesive to secure the tip(half a bead) of the vulcan to the main part of the vulcan. Then together they were secured to the head using blue tac as well.
*But in the end, a whole bead was used instead because it looks better.
Scribing panel lines:
Followed the tutorial from here.
Details for the shoulder:
Used pencil to draw out my desired panel lines on the shoulder.
Then masked it up along the lines and use a needle to scribe out the lines.
Then I used an acrylic cutter to deepen the lines.
When I'm done, the surface was filed down using a fine grit sandpaper.
New panel lines:
This is another part, didn't really have much progress pix for the whole process.
Recoloring for the poor man:
I ain't got no airbrush & compressor and using Mr. Hobby mini spray cans at 10bucks a pop is way too costly.
So I turned to using industrail spray paints. They cost s$3.50 a can and they come in bigger cans of course. The only problem with them is that the paint is quite coarse and it is very hard to achieve a smooth finish. So I'd be spraying from a greater distance(misting).
Choice of colors:
ANCHOR Red, White, Pale Grey, Dark Grey(S$3.50 each) and a Mr. Hobby primer(S$11.90!!!)
Test trial:
Tested the four main colours on a piece of paper to see if the colors complement one another.
Photoshop time:
To give me a feel of what it could look like, the above image is a briefly photoshopped pic of a color scheme which I intend to do.
Priming the parts:
Dark colored parts must be prime before painting since I'm attempting to recolor them.
The Hangar24 is a great help for spray painting jobs.
Preview of the wings:
Adding beads:
I did said that I'm gonna be putting the beads to good use, didn't I?
A brief look on how the beads are added to strategic parts of the kit.
Making your mark:
Use a sharp tool to make a mark on your selected spot.
This is to prevent your drill bit from slipping as you are drilling.
Boring:
Depending on the size of your bead, bore a hole using a drill bit of a slightly smaller diameter and then file it down to size. This way, your bead would be able to fit snuggly in the hole without the use of any adhesive.
Fitting the bead:
Use a pair of tweezers to fit the bead into the hole.
Not all the way in:
Use the back of your tweezers to push the bead into the snug fitting hole.
If the hole is very tight, it's probably not a good idea to use brute force to push it in because it may break the bead(it's made of glass) or crack your plastic.
The bead need not be push in all the way until it's flush with the surfce of the plastic, this is to give it a more natural look of a rivet or something.
Making a stand:
Materials that I'd be using
- acrylic sheets(1.4mm thick,A4 size)
- acrylic stick(5mm diameter,1m long)
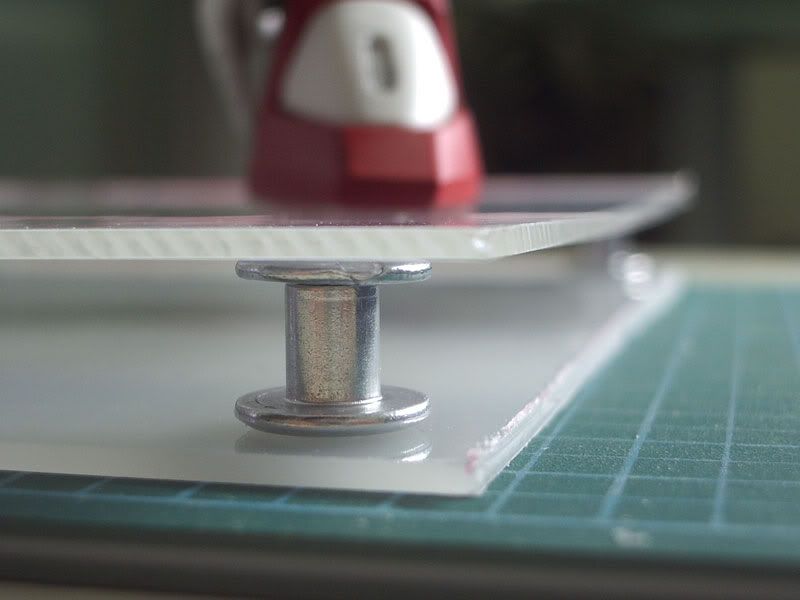
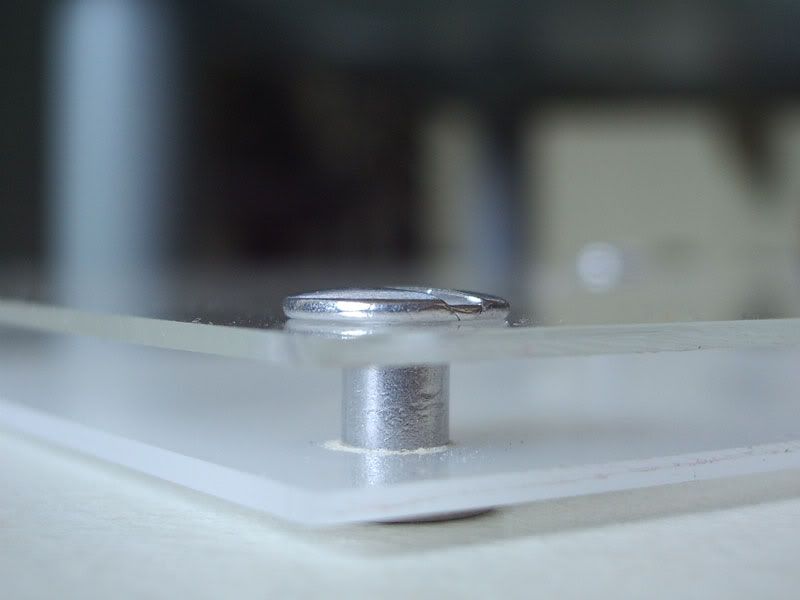
- special nut and bolt
The base is made from two acrylic sheets, one on top of the other.
The top one is clear while the bottom one is translucent white.
The clear acrylic is elevated from the translucent white one but the four nuts & bolts mounted at the four corners.
The inital dimension of the base is 15 x 15 cm but due to inexperience with the acrylic cutting tool, the acrylic was cracked in various undesirable areas during the score & snap process.
So now it is 13 x 13 cm after some recovery work.
The base:
This is approximately how it'll look like.
By the way, the blue tool is the acrylic cutter.
The nut & bolt:
This is not exactly how it's gonna be placed. I'm just putting it in place to see how it looks and to plan where it should be mounted.
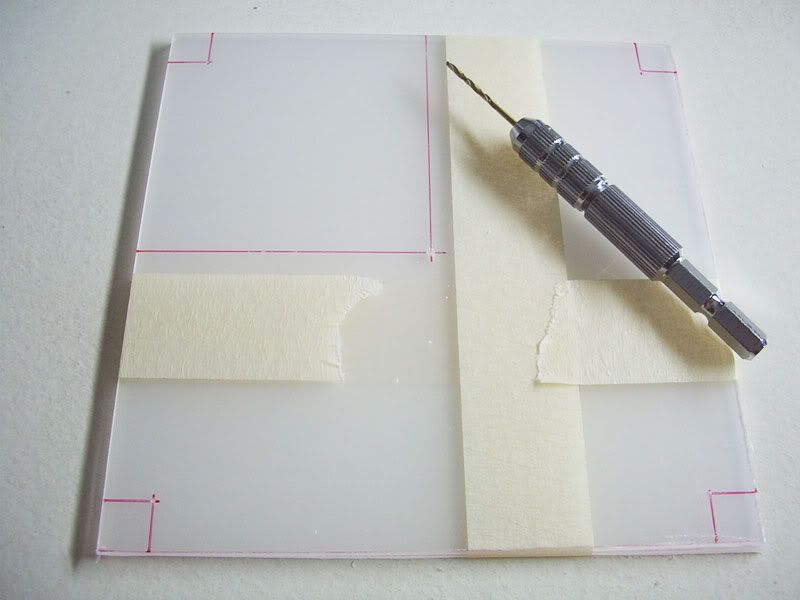
Drilling:
The nuts & bolts sizes were measured before marking out the positions of the holes on the base.
The center hole(5mm) is for the backbone of the stand.
Fitting time:
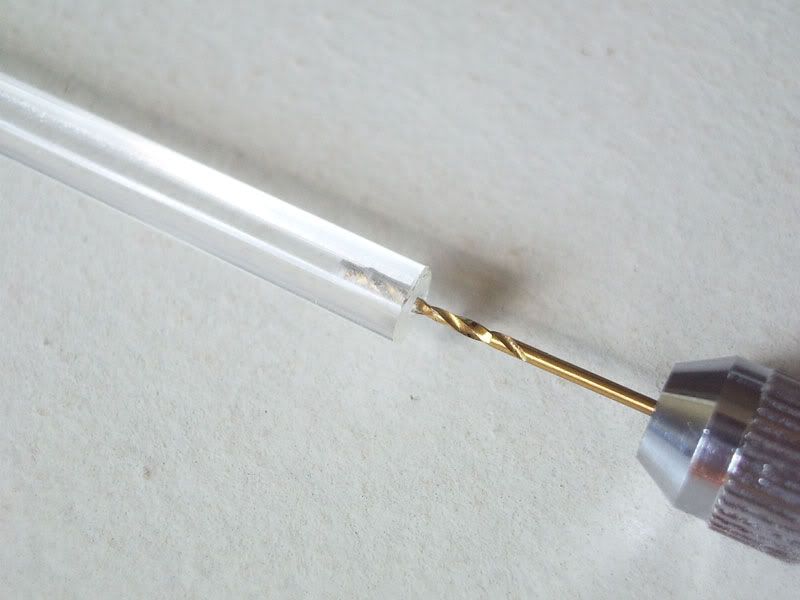
Connecting to the kit:
The usual method to stick a kit to the base is by using a stainless steel rod and poking it up the butt of the kit which has a suitable hole bored into it.
The diameter of the acrylic backbone(5mm) is simply too thick to initiate a hole to be bored in the butt of the kit. Hence a small hole is drilled into the backbone and a short segment of stainless steel in inserted into it. The other end of the rod would go into the butt of the kit.
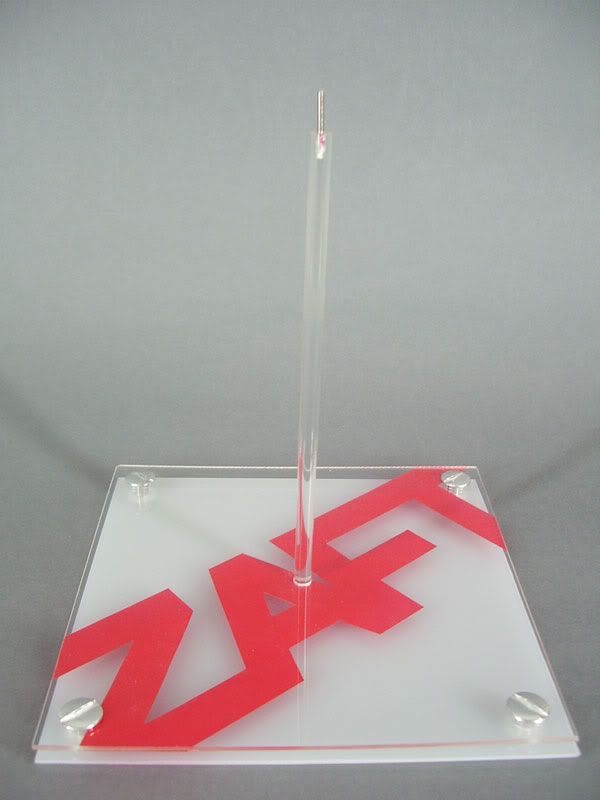
Completed stand:
With the completed kit:
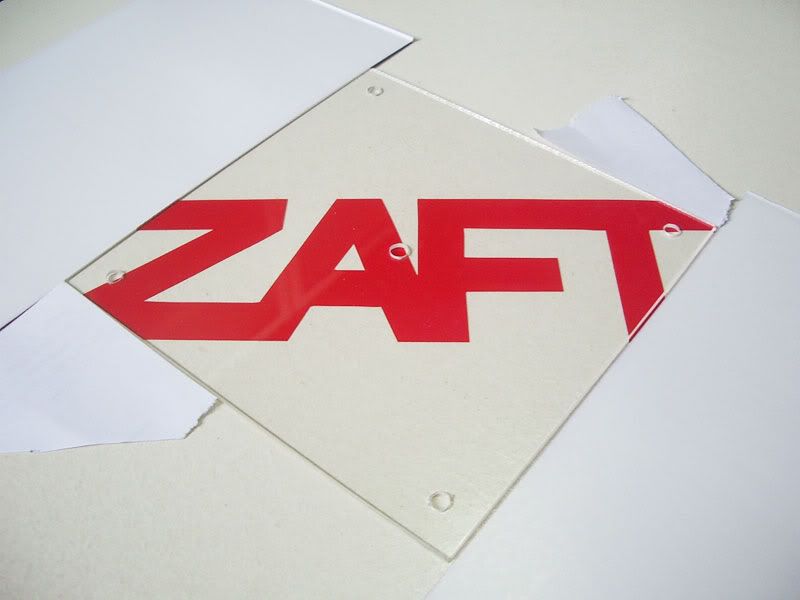
Too plain?:
A ZAFT word design was drawn and cut out from a tranparency. Then it was painted and glued to the underside of the clear acrylic.
Finalised:
Completion:
The complete gallery of XBL Freedom Gundam be viewed at Gundam Hangar.


Comments
Count on me.... Freedom!
Lovely work with a bootleg. Its highly commendable.
toycon:mai lai lah,i dun hav the barcode. let's do the nelson on others when the compy displays goes on in taka.
cow:u can do it too! Guaiz! DO IT!