[BAKUC-06] MG GM Sniper Custom Ver.Ka
HOW IT BEGAN
I was watching Keroro Gunso The Movie when they featured Fuyuki buying a new MG release for Gunso, and this MG kit is an MG GM Sniper Custom Ver.Ka.
Earlier on, in one of the episode of Keroro Gunso, they featured an MG Gyan and one year later, Bandai released an MG Gyan.
So can we expect an MG GM Sniper Custom Ver.Ka?
The answer is here:
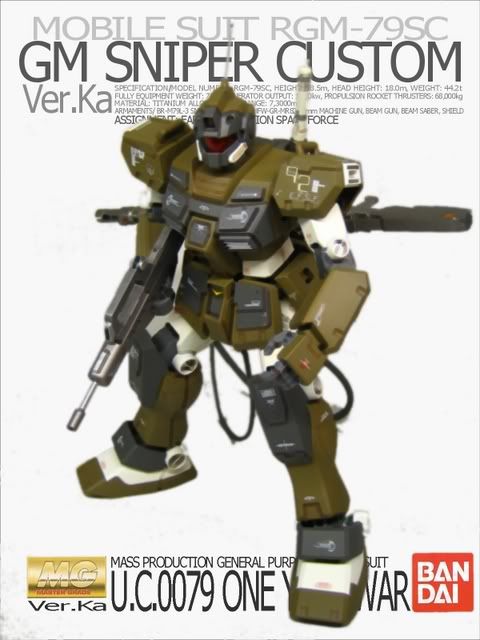
Click above box art to view complete kit gallery or visit MECHA:BASE.
Do not be alarmed!
MG GM Sniper Custom Ver.Ka (RGM-79SC) has not been released yet. There wasn't even the slightest information. However, the RGM-79SC was being released as a Gundam Fix Figuration #0032.

Initially, I could not find myself liking any version of the GM. But after seeing the GFF RGM-79SC, I grew an acquired taste for the GM.
I have decided to pick up one of the MG RGM-79C and mod it into an RGM-79SC, making the Keroro dream a reality.
WIP
It started off as an MG GM Type C Kai. It was clearing at a damn irresistable price. I had wanted to keep it for a Powered GM Conversion, but the conversion parts were too expensive to be considered at all.

This is my first Master Grade Gunpla construction and I am already taking up this challenge to build this kit for BAKUC. Immediately after laying out the tree, I know that recoloring is going to be a tough job. Just look at the crappy green colour!

Head Construction was easy without much skill involved. I had intended to make use of modelling video tips to work on the head, which is to cement the head piece without the visor to facilitate painting & for completness. I would then cut the interior of the head so that i can slot in the visor after painting the sealed head. But it was impossible as the visor had an extension on the top that needs to be slotted in horizontally. So, ive decided to leave the head with the seam line. I spray painted the Front face of the visor with a few coats of Hobby clear orange until a thick and rich colour was achieved. I then try polishing with rubbing compound 1000, but I could not reach the corners with the cotton bud and so i ended up having chunks of white compound in the corners. There was also a lot of scratches. I got no choice but to polish until i have no more paint. I used a pointed forceps to clean up the corners with some tissue. I then used the ladies nail buffer to buff the clear visor till its pristine looking then repeat the clear orange. This time no more polishing. The GFF RGM-79SC is supposed to have a protective visor armour over the forehead where the scope is, but i decide to scribe in the details and it looks fine to me...

Body construction was simple with just 9 pieces: Neck cover, Chest Front, Chest Back, Cockpit hatch cover, Torso, internal skeleton, Core cockpit Dock, 2x Chest Vents. I left the seam lines on the chest uncemented as I was not confident with my masking for AB. I added 0.6mm pla plates to slightly bulk up the chest as armour plates like that of the GFF. I had to remove a plate off the cockpit hatch cover as it hindered the opening of the hatch. I then scribed in the shape of the armour plate & also the chest where 2 colors would seperate.
Skirt. Pla plates were added on the plain skirt for some details.
Upper Limbs were the easiest with cementing done during construction. No detailing required. Fingers are seperated into thumb, index and a piece of 3 fingers.

Lower Limbs were the headache. The skeleton was fantastic since it being an MG. I had fun building the pistons at the articulation points. It even had a braided tube to run then anterior knee pistons through. I would love to show off the skeleton with some painting but that would not fit my theme. So I decided not to seal the seams. I examined the limb armours. The thigh had a unique seamline that runs down the lateral & medial sides. These lines were visible in most versions of RX-78 & even GFF 0032. Some models also kept the seam line as panel line & I followed. The real bitch was the leg as when the seam line met, the front piece had a small portion sticking out. I also had to rework the knee cap armour. I had to bulk it up. I've cut the shape of the final knee cap on 0.25mm plaplate. The shape ot the existing kneeI was curved and I had to file them flat to fit the plaplates nicely. I made some dissolved putty to fill in gaps between the pla plate & the main piece. The putty took more than a week to cure. So I poked a few holes to speed up the curing. After curing, the rest of the pla plates were cemented to form the new knee cap armour. The feet were simple build.


The raw assembly of the GM looks good enough for an OOB. But I cannot settle for just an OOB. The assembly after the simple mods look satisfactory. Time to start on the painting.


Before


After
Thanks to flanker27's ABing lessons & most importantly sty's workshop and AB. I have embarked on my virgin AB work. I utilized a full bottle of Olive Drab FS34087 (304), RLM66 Black Gray (116) and the remainder of Off White (69). I had not primed so the off white ended up looking greenish even after 3 coats. I ran out of Off White and even used up the remainder of neXus' White. I had to return on my second session to touch up the white with Gray FS3662 (311). Gray FS3662 gave a nice beigey smokey white effect and IMO a good colour for all future white areas. I took 2 full afternoon sessions to complete the painting. Finer details were painted by brush.


The Base idea came at the last minute when I realized that time was running out. I was inspired by neXus' concentric base design and worked out my own. I used 0.3mm cards from AMEX promotion phamplets to substitute pla plates. After cutting out the shapes, I sprayed them with Red Fox Bright Silver over Anchor Gray Dusk. The underside was sprayed with adhesive and mounted on a painted MDF board. MDF board was purchased from Art Friend and sprayed with Anchor Gray Dusk. I printed the box art and rear and placed it between 2 acrylic sheets.The acrylic sheets were fixed by rivets and mounted to the MDF using screws. A mishap happened during the photoshoot. I accidentally kicked the base and the acrylic snapped at the screws. Thanks to neXus who saved my day with his acrylic sheet. This time I know not to screw into the acrylic as this creates a tension zone.


There you have it. My experience building this MG GM Sniper Custom Ver.Ka.

Click above box art to view complete kit gallery or visit MECHA:BASE.
I was watching Keroro Gunso The Movie when they featured Fuyuki buying a new MG release for Gunso, and this MG kit is an MG GM Sniper Custom Ver.Ka.
Earlier on, in one of the episode of Keroro Gunso, they featured an MG Gyan and one year later, Bandai released an MG Gyan.
So can we expect an MG GM Sniper Custom Ver.Ka?
The answer is here:
Click above box art to view complete kit gallery or visit MECHA:BASE.
Do not be alarmed!
MG GM Sniper Custom Ver.Ka (RGM-79SC) has not been released yet. There wasn't even the slightest information. However, the RGM-79SC was being released as a Gundam Fix Figuration #0032.

Initially, I could not find myself liking any version of the GM. But after seeing the GFF RGM-79SC, I grew an acquired taste for the GM.
I have decided to pick up one of the MG RGM-79C and mod it into an RGM-79SC, making the Keroro dream a reality.
WIP
It started off as an MG GM Type C Kai. It was clearing at a damn irresistable price. I had wanted to keep it for a Powered GM Conversion, but the conversion parts were too expensive to be considered at all.
This is my first Master Grade Gunpla construction and I am already taking up this challenge to build this kit for BAKUC. Immediately after laying out the tree, I know that recoloring is going to be a tough job. Just look at the crappy green colour!
Head Construction was easy without much skill involved. I had intended to make use of modelling video tips to work on the head, which is to cement the head piece without the visor to facilitate painting & for completness. I would then cut the interior of the head so that i can slot in the visor after painting the sealed head. But it was impossible as the visor had an extension on the top that needs to be slotted in horizontally. So, ive decided to leave the head with the seam line. I spray painted the Front face of the visor with a few coats of Hobby clear orange until a thick and rich colour was achieved. I then try polishing with rubbing compound 1000, but I could not reach the corners with the cotton bud and so i ended up having chunks of white compound in the corners. There was also a lot of scratches. I got no choice but to polish until i have no more paint. I used a pointed forceps to clean up the corners with some tissue. I then used the ladies nail buffer to buff the clear visor till its pristine looking then repeat the clear orange. This time no more polishing. The GFF RGM-79SC is supposed to have a protective visor armour over the forehead where the scope is, but i decide to scribe in the details and it looks fine to me...
Body construction was simple with just 9 pieces: Neck cover, Chest Front, Chest Back, Cockpit hatch cover, Torso, internal skeleton, Core cockpit Dock, 2x Chest Vents. I left the seam lines on the chest uncemented as I was not confident with my masking for AB. I added 0.6mm pla plates to slightly bulk up the chest as armour plates like that of the GFF. I had to remove a plate off the cockpit hatch cover as it hindered the opening of the hatch. I then scribed in the shape of the armour plate & also the chest where 2 colors would seperate.
Skirt. Pla plates were added on the plain skirt for some details.
Upper Limbs were the easiest with cementing done during construction. No detailing required. Fingers are seperated into thumb, index and a piece of 3 fingers.
Lower Limbs were the headache. The skeleton was fantastic since it being an MG. I had fun building the pistons at the articulation points. It even had a braided tube to run then anterior knee pistons through. I would love to show off the skeleton with some painting but that would not fit my theme. So I decided not to seal the seams. I examined the limb armours. The thigh had a unique seamline that runs down the lateral & medial sides. These lines were visible in most versions of RX-78 & even GFF 0032. Some models also kept the seam line as panel line & I followed. The real bitch was the leg as when the seam line met, the front piece had a small portion sticking out. I also had to rework the knee cap armour. I had to bulk it up. I've cut the shape of the final knee cap on 0.25mm plaplate. The shape ot the existing kneeI was curved and I had to file them flat to fit the plaplates nicely. I made some dissolved putty to fill in gaps between the pla plate & the main piece. The putty took more than a week to cure. So I poked a few holes to speed up the curing. After curing, the rest of the pla plates were cemented to form the new knee cap armour. The feet were simple build.
The raw assembly of the GM looks good enough for an OOB. But I cannot settle for just an OOB. The assembly after the simple mods look satisfactory. Time to start on the painting.
Before
After
Thanks to flanker27's ABing lessons & most importantly sty's workshop and AB. I have embarked on my virgin AB work. I utilized a full bottle of Olive Drab FS34087 (304), RLM66 Black Gray (116) and the remainder of Off White (69). I had not primed so the off white ended up looking greenish even after 3 coats. I ran out of Off White and even used up the remainder of neXus' White. I had to return on my second session to touch up the white with Gray FS3662 (311). Gray FS3662 gave a nice beigey smokey white effect and IMO a good colour for all future white areas. I took 2 full afternoon sessions to complete the painting. Finer details were painted by brush.
The Base idea came at the last minute when I realized that time was running out. I was inspired by neXus' concentric base design and worked out my own. I used 0.3mm cards from AMEX promotion phamplets to substitute pla plates. After cutting out the shapes, I sprayed them with Red Fox Bright Silver over Anchor Gray Dusk. The underside was sprayed with adhesive and mounted on a painted MDF board. MDF board was purchased from Art Friend and sprayed with Anchor Gray Dusk. I printed the box art and rear and placed it between 2 acrylic sheets.The acrylic sheets were fixed by rivets and mounted to the MDF using screws. A mishap happened during the photoshoot. I accidentally kicked the base and the acrylic snapped at the screws. Thanks to neXus who saved my day with his acrylic sheet. This time I know not to screw into the acrylic as this creates a tension zone.
There you have it. My experience building this MG GM Sniper Custom Ver.Ka.
Click above box art to view complete kit gallery or visit MECHA:BASE.


Comments
BAKUC BAKUC BAKUC!!